How to Create and Update Projects in ChatGPT
Projects are dedicated, self-contained workspaces that include broad instructions, context documents, and distinct chats.
Creating a Project in ChatGPT
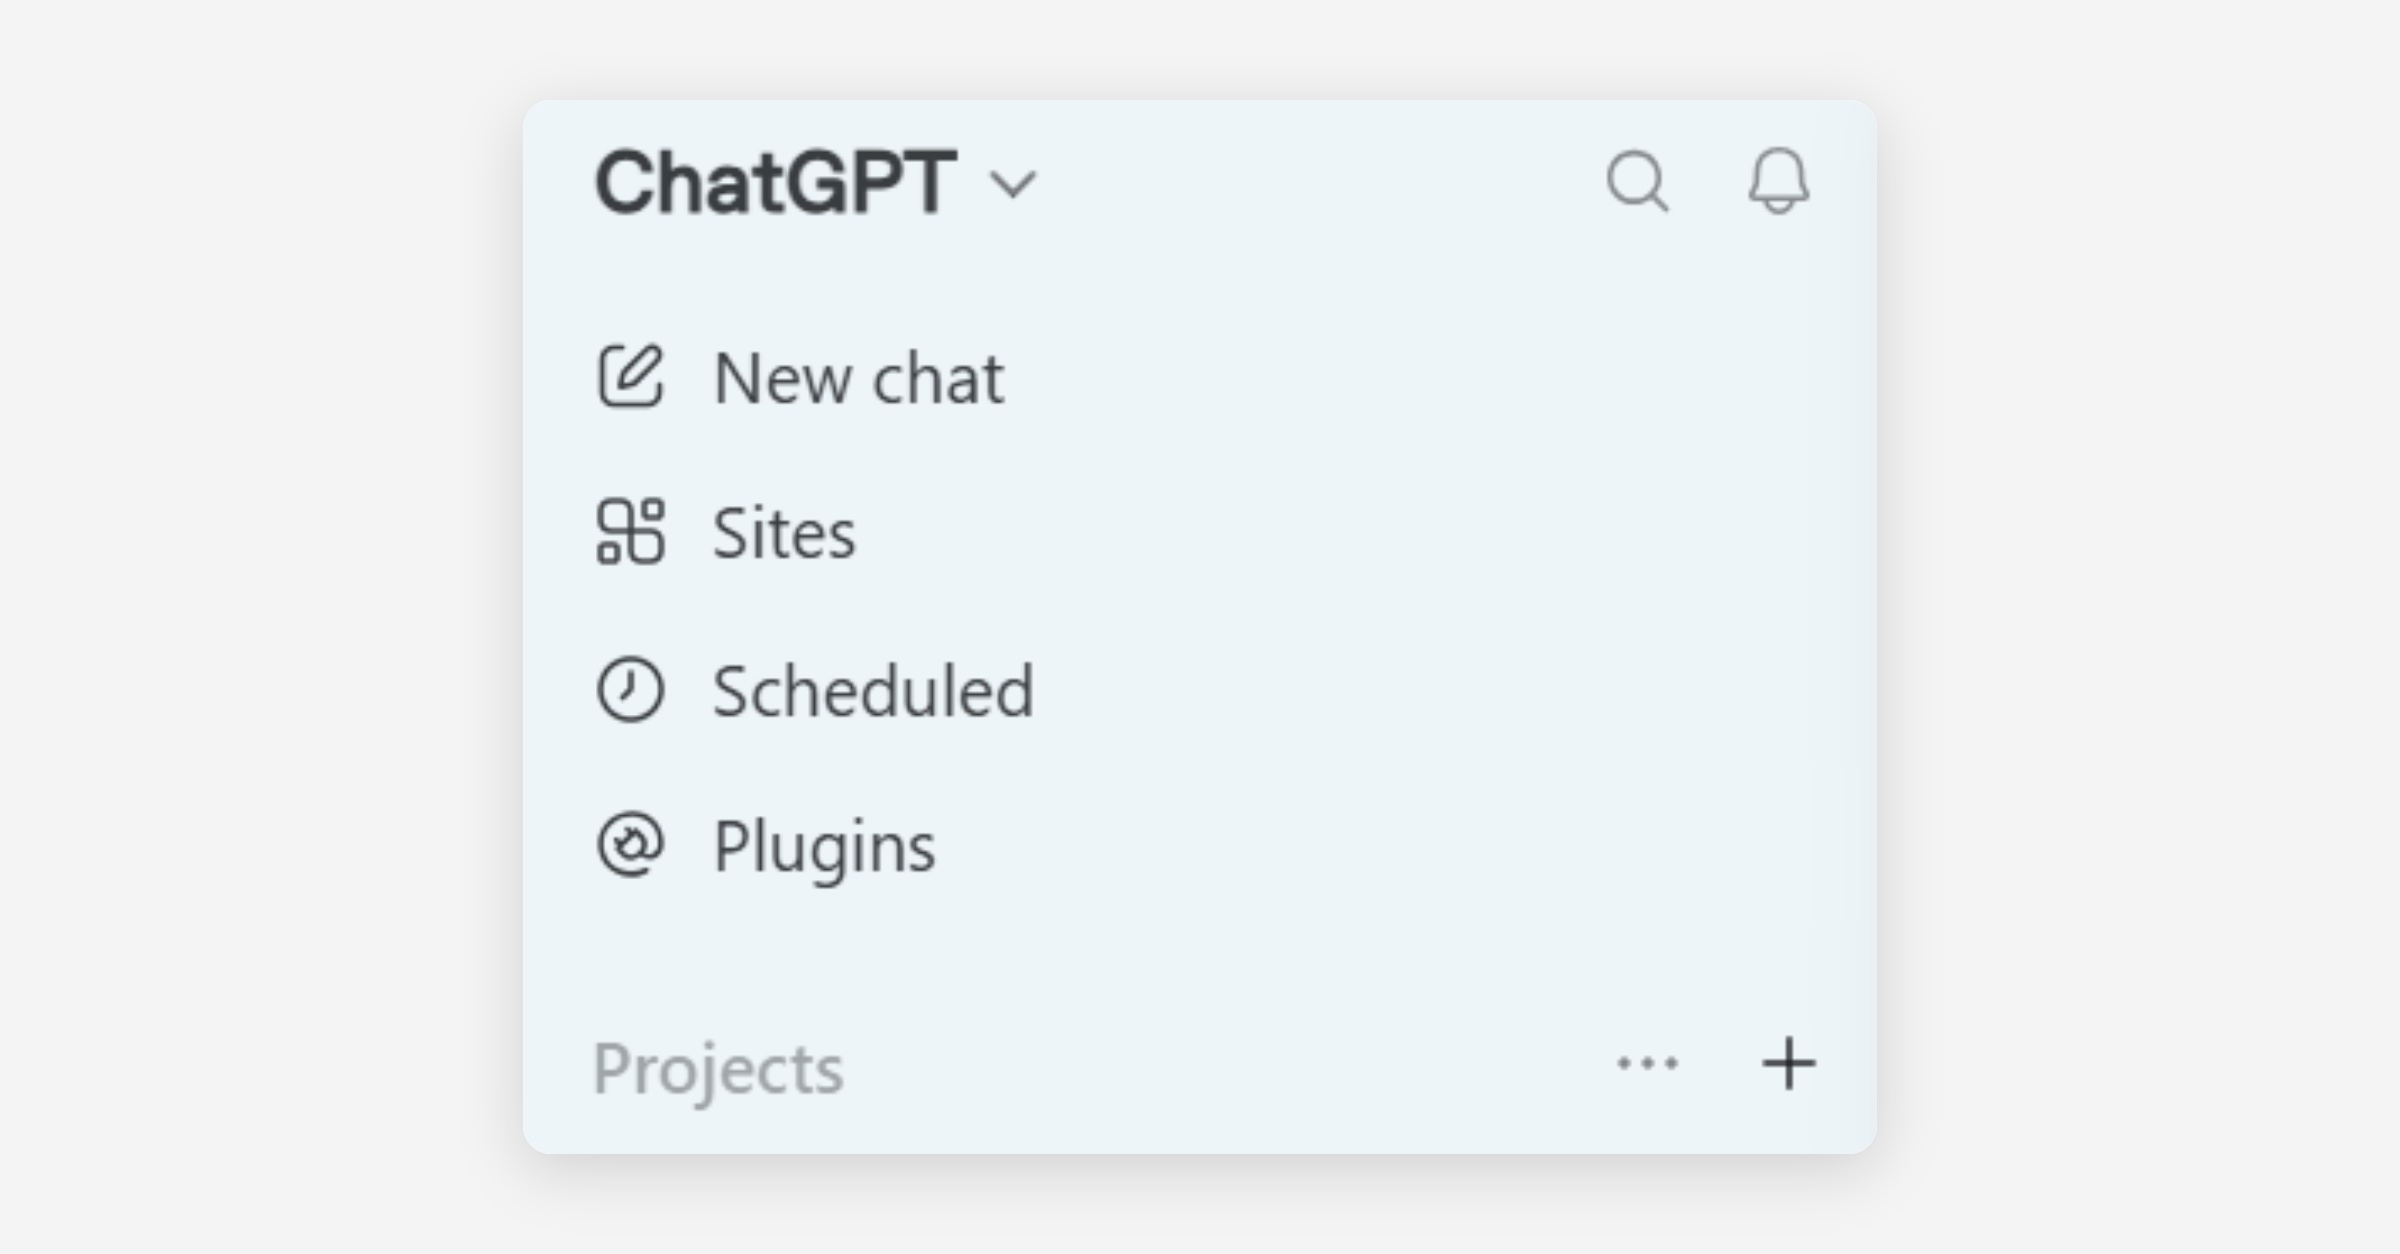
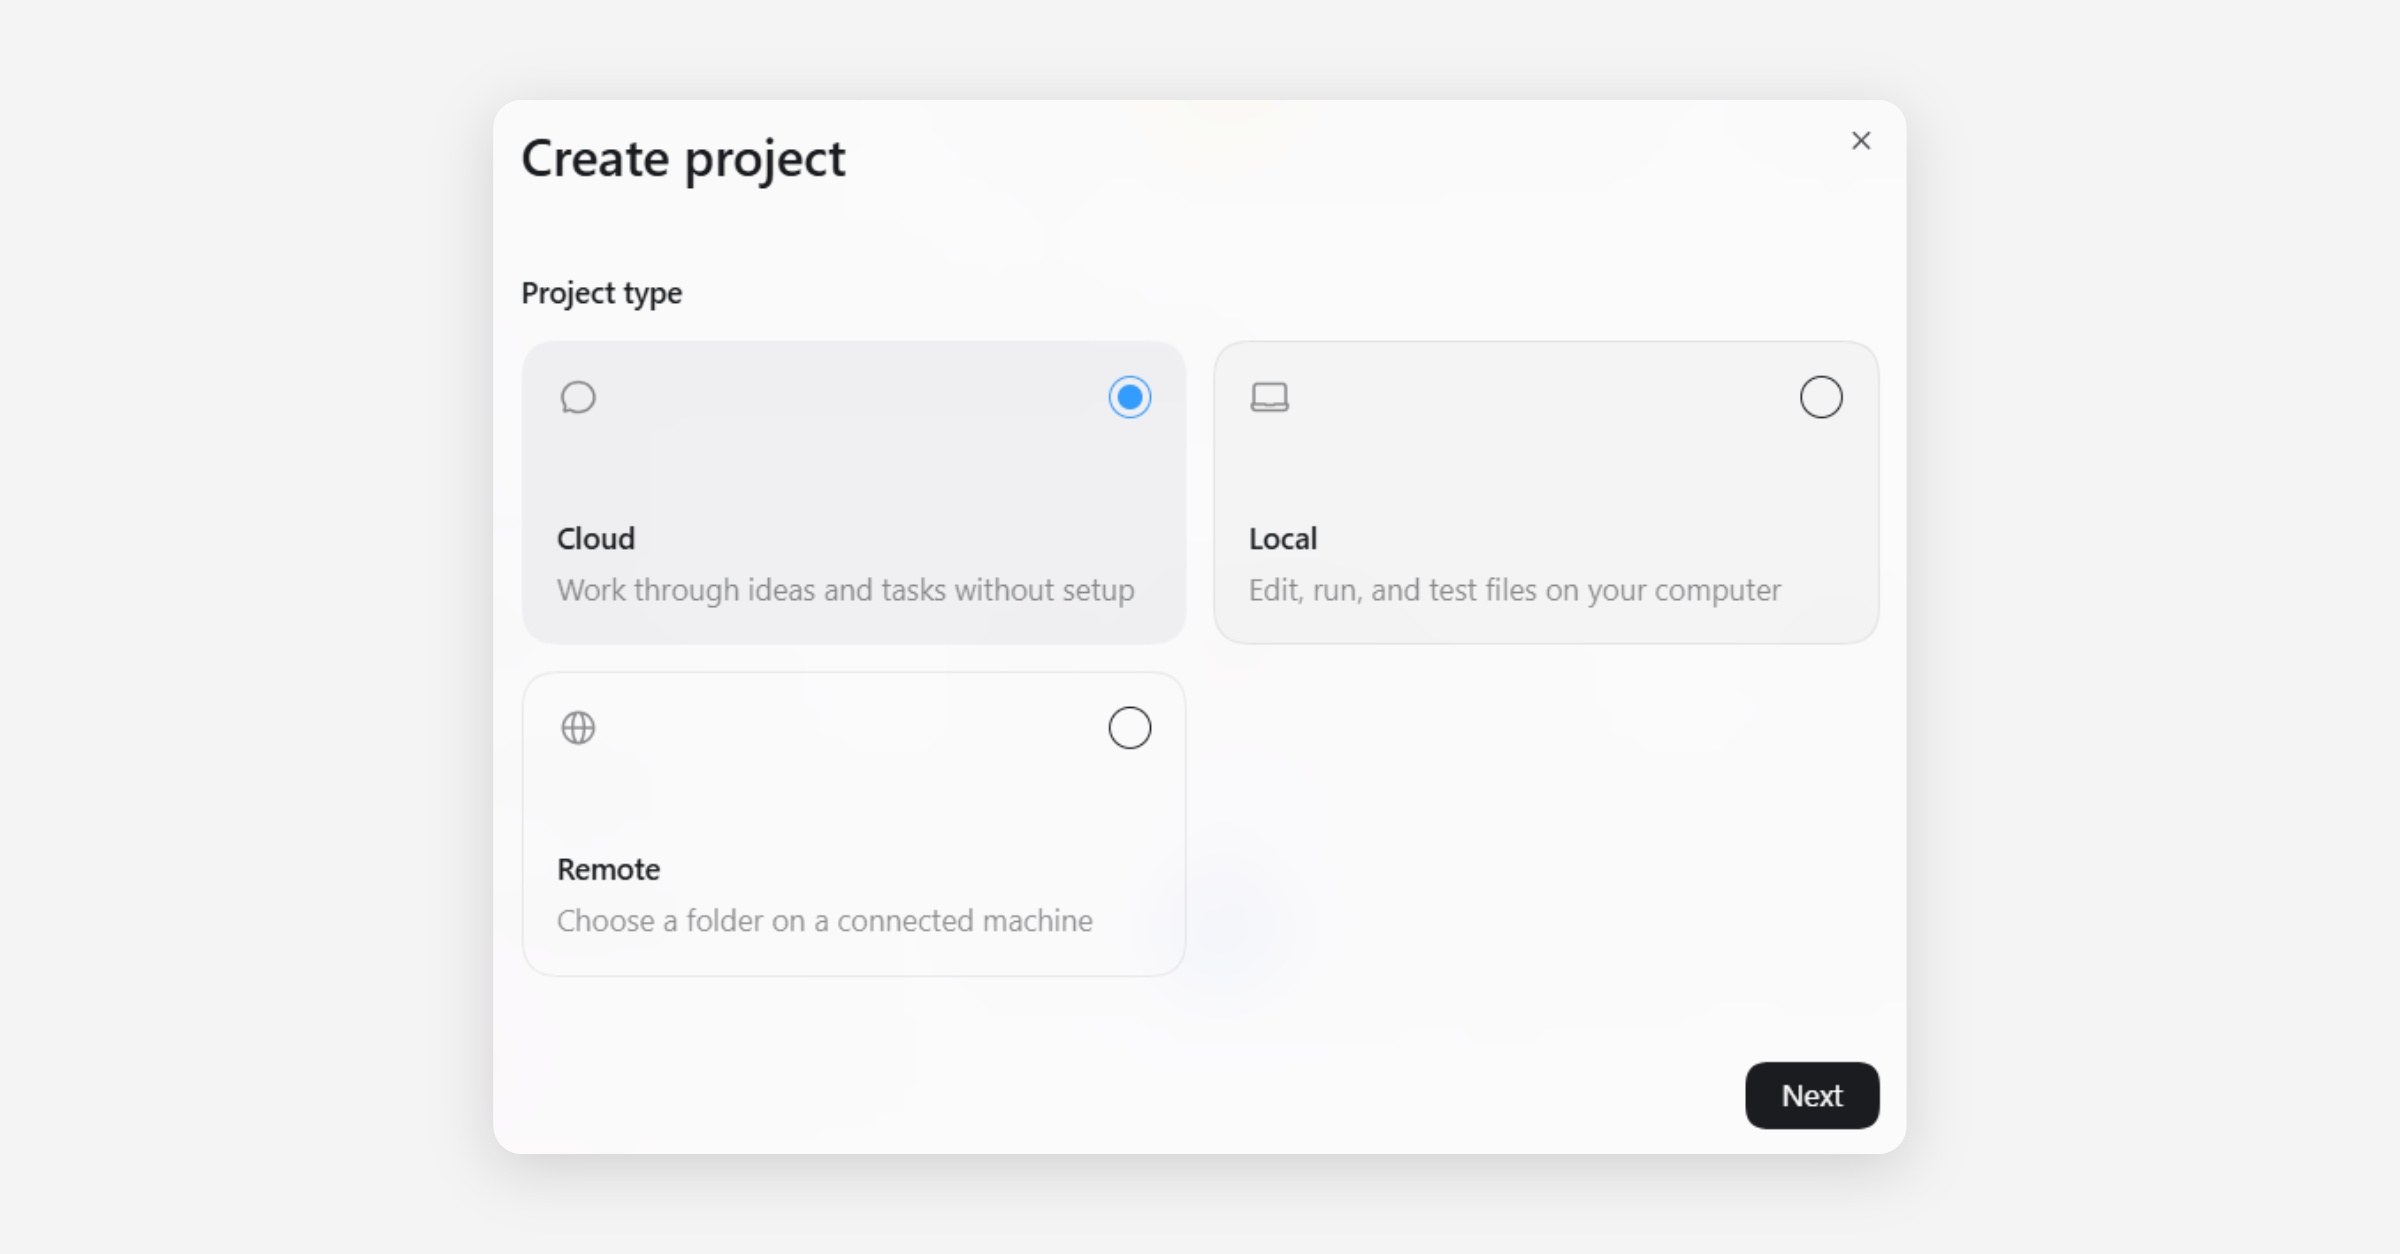
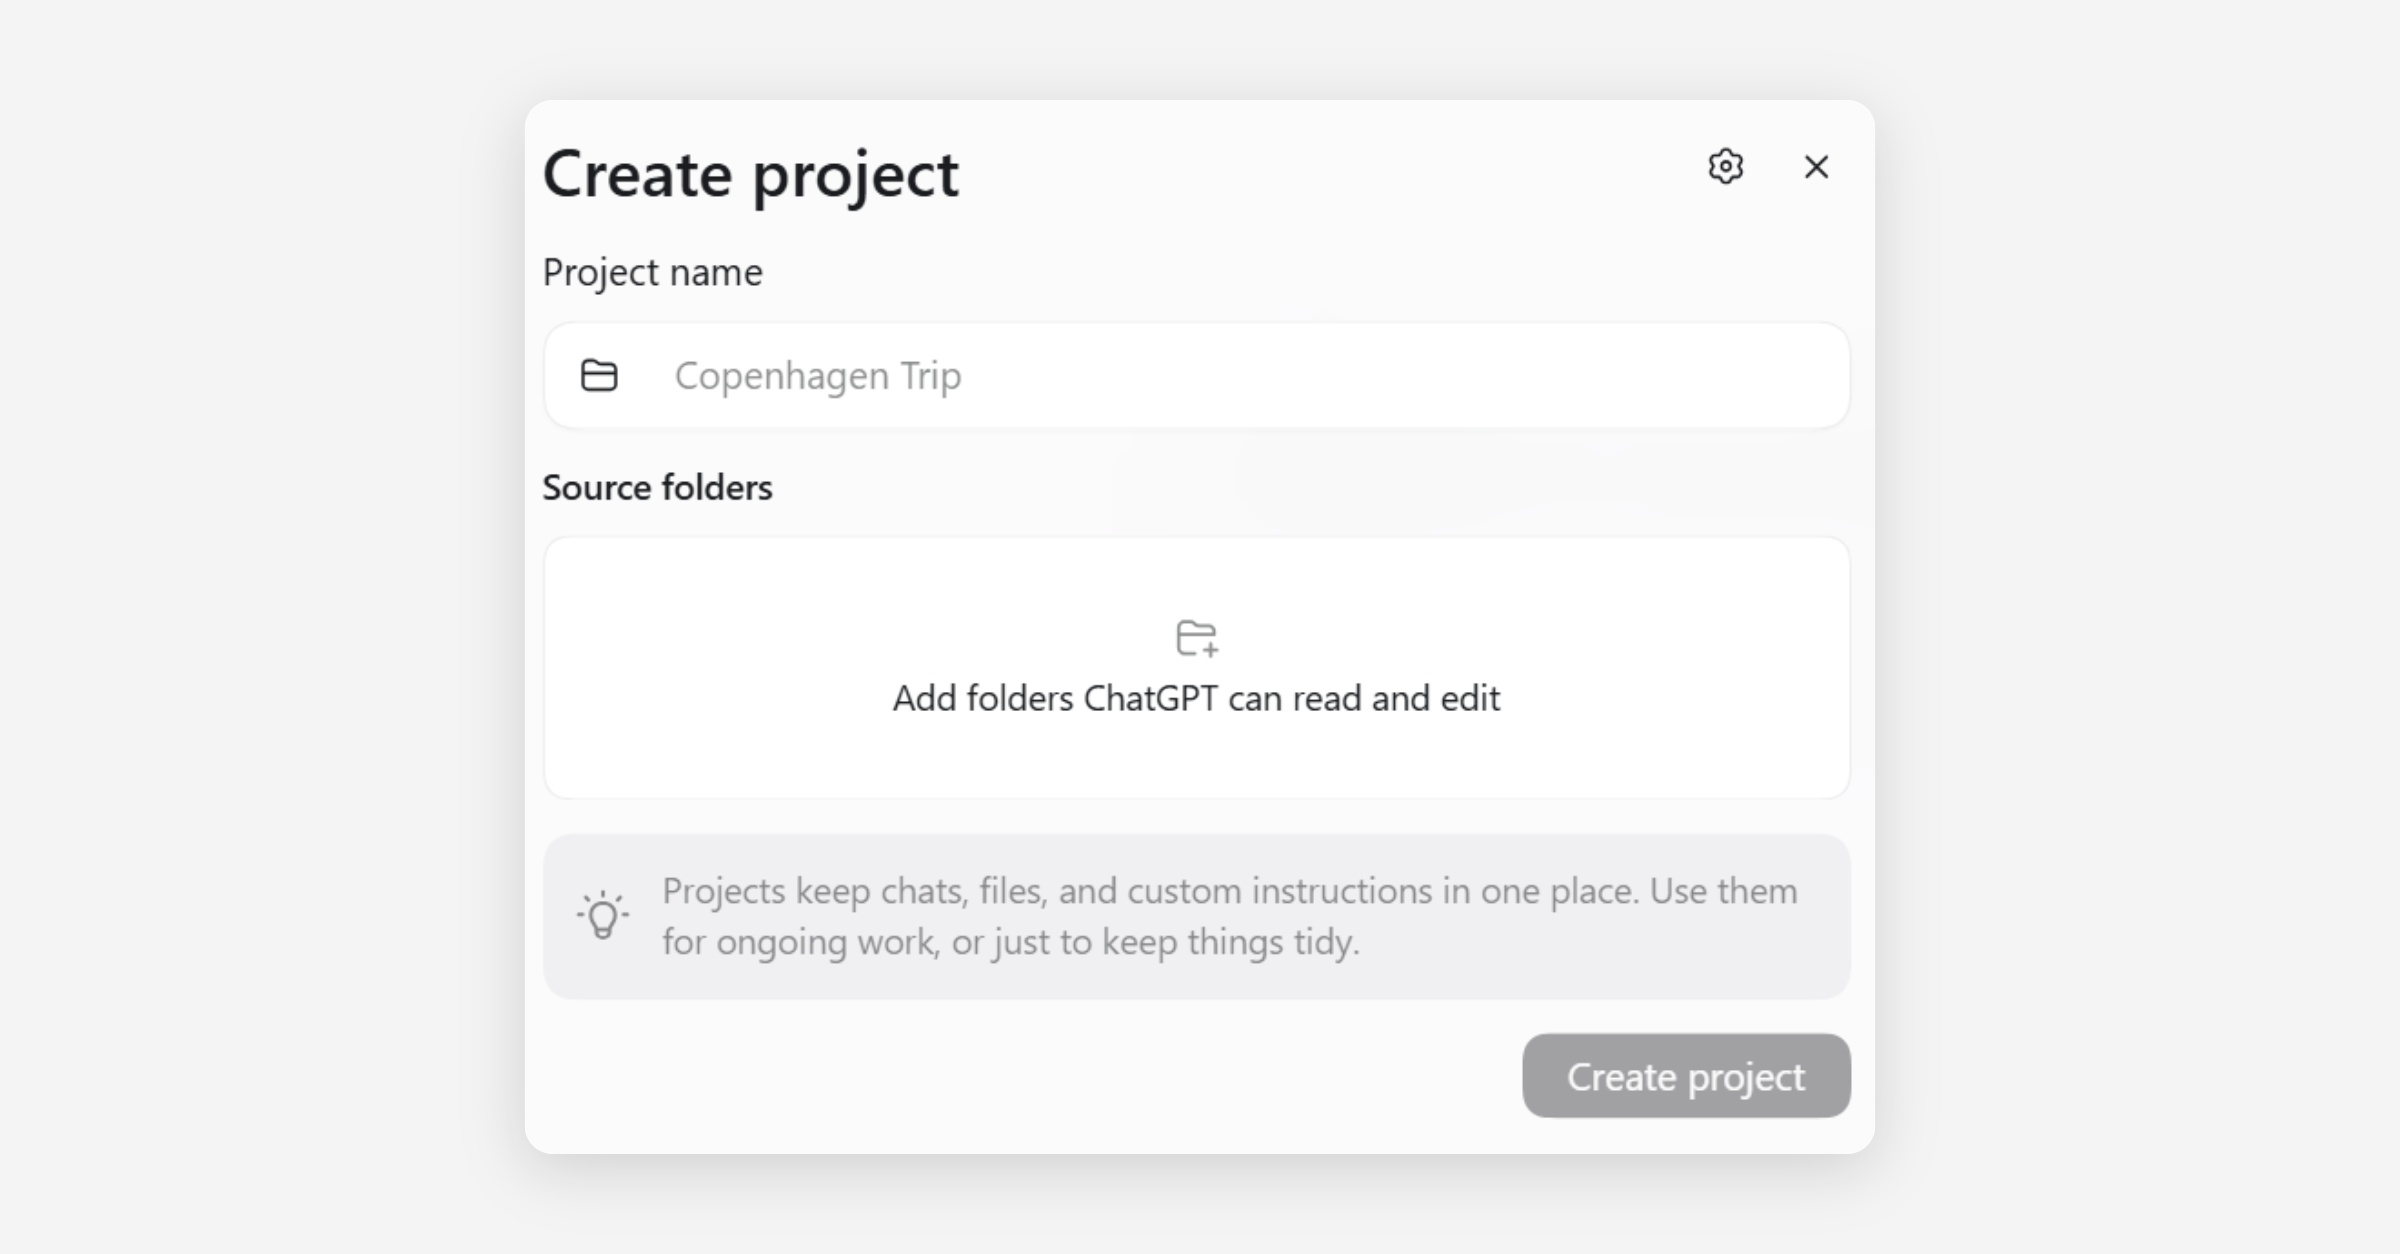
In the ChatGPT interface, click on the ‘+’ next to ‘Projects’ in the left sidebar (top image in trio below). Choose whether you would like to run the project in the cloud, locally, or on a remote server (middle image in trio below). Add a title and folders that the project may access (bottom image in trio below).
Updating a Project in ChatGPT
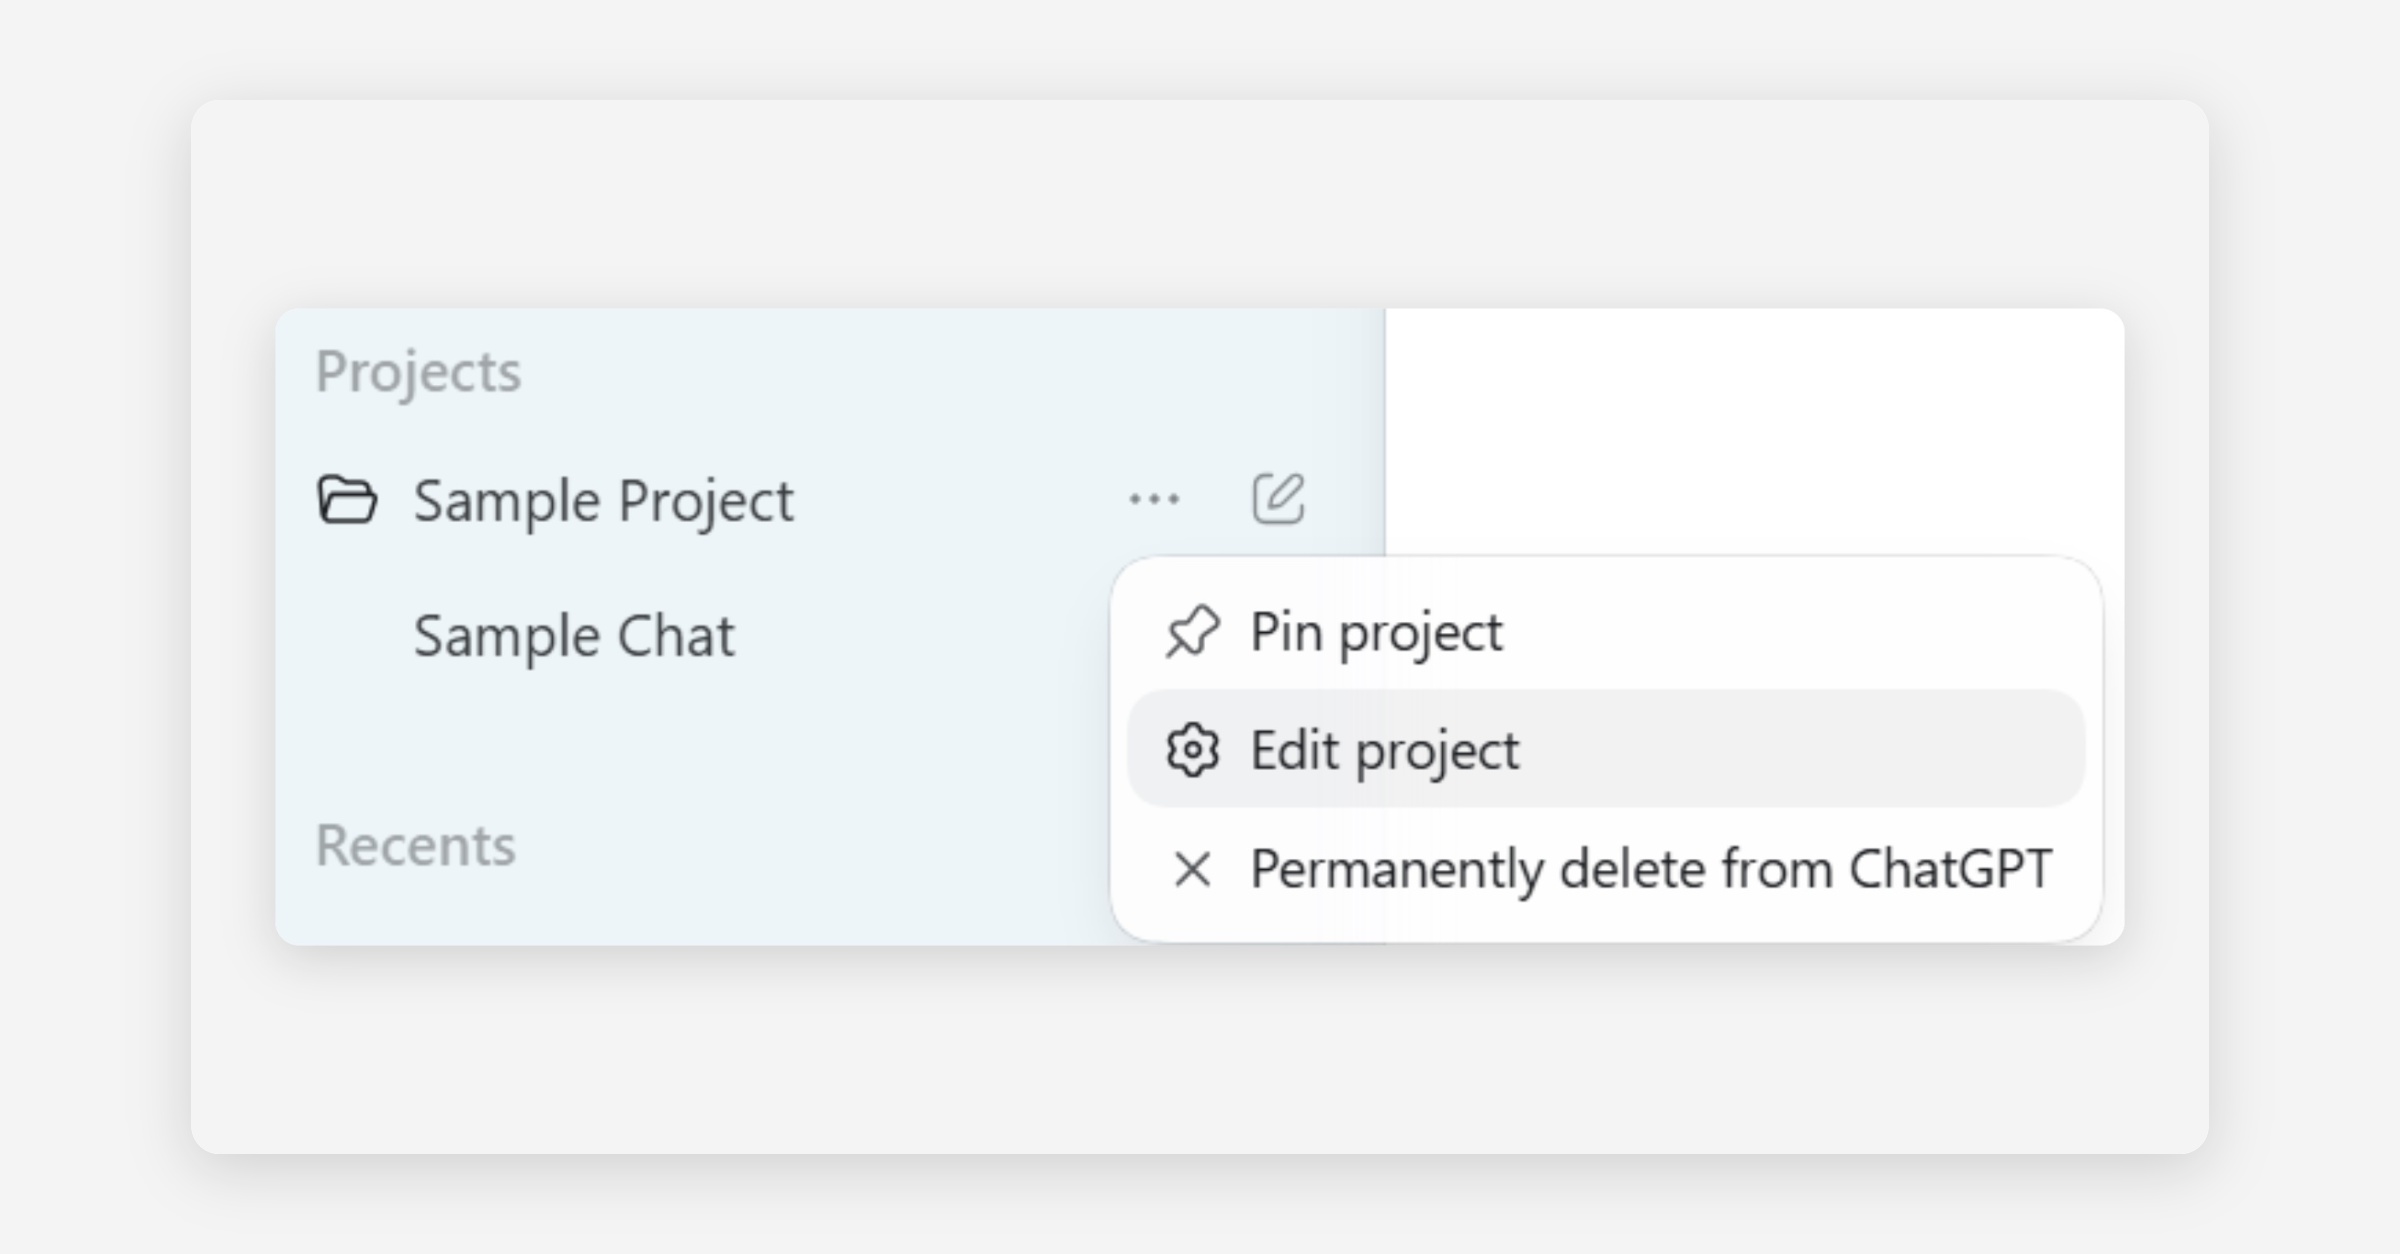
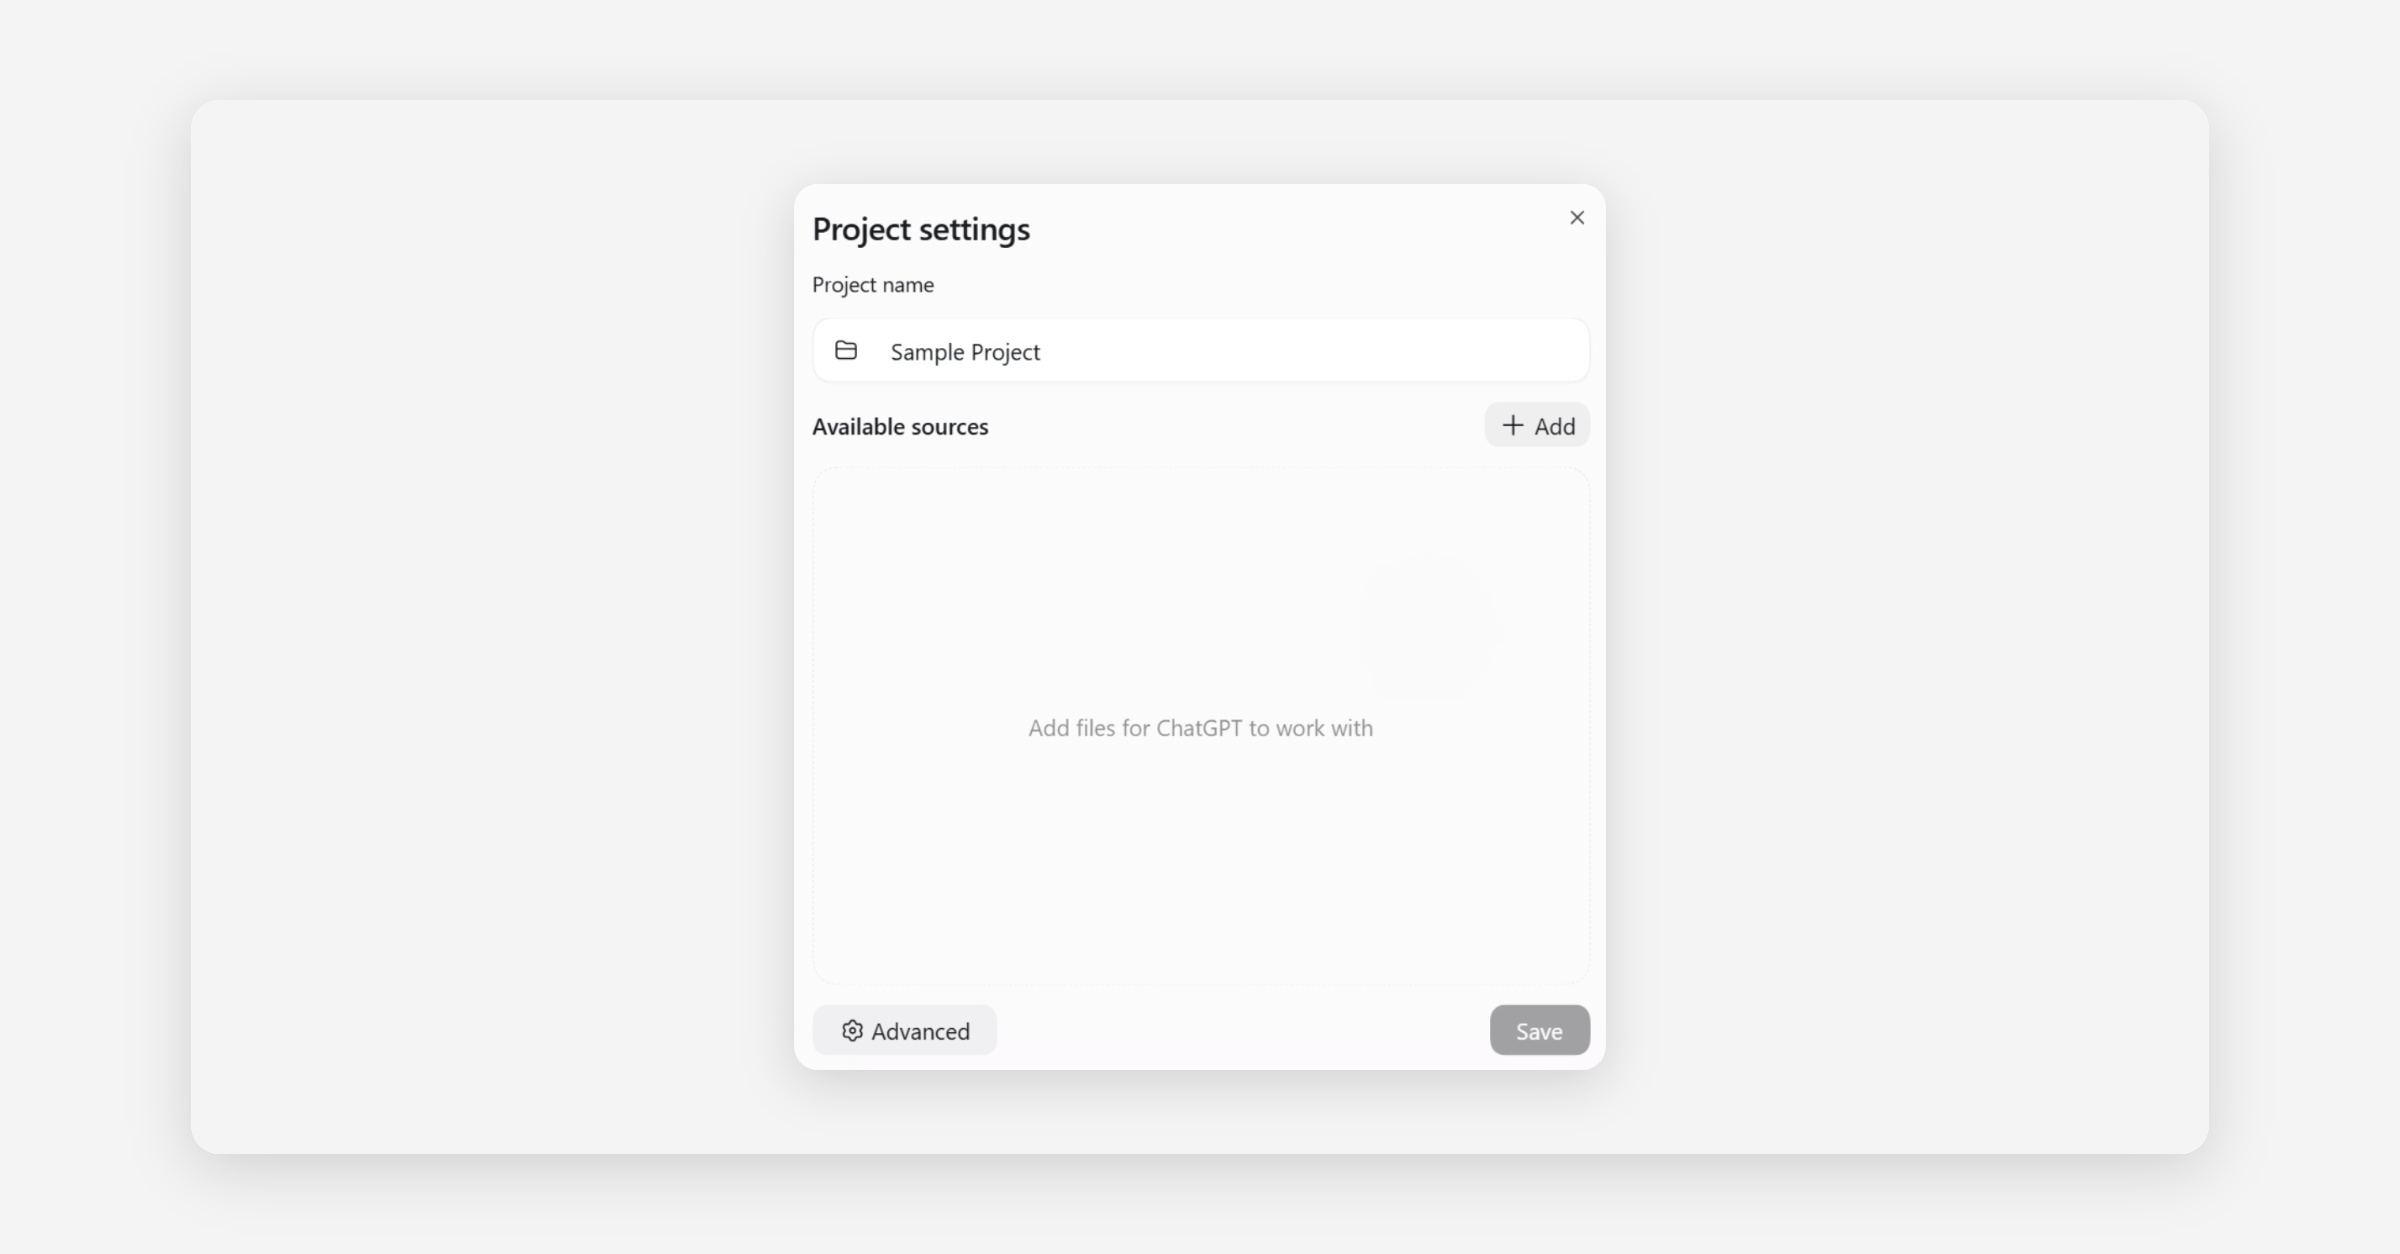
To add new documents or folders as context for an existing project, click on the three-diamond symbol next to your project, and select ‘Edit project’ from the drop-down menu (see top image in group below). A ‘Project settings’ interface will appear on-screen: click on ‘+ Add’ to add sources. (see 2nd image in group below).
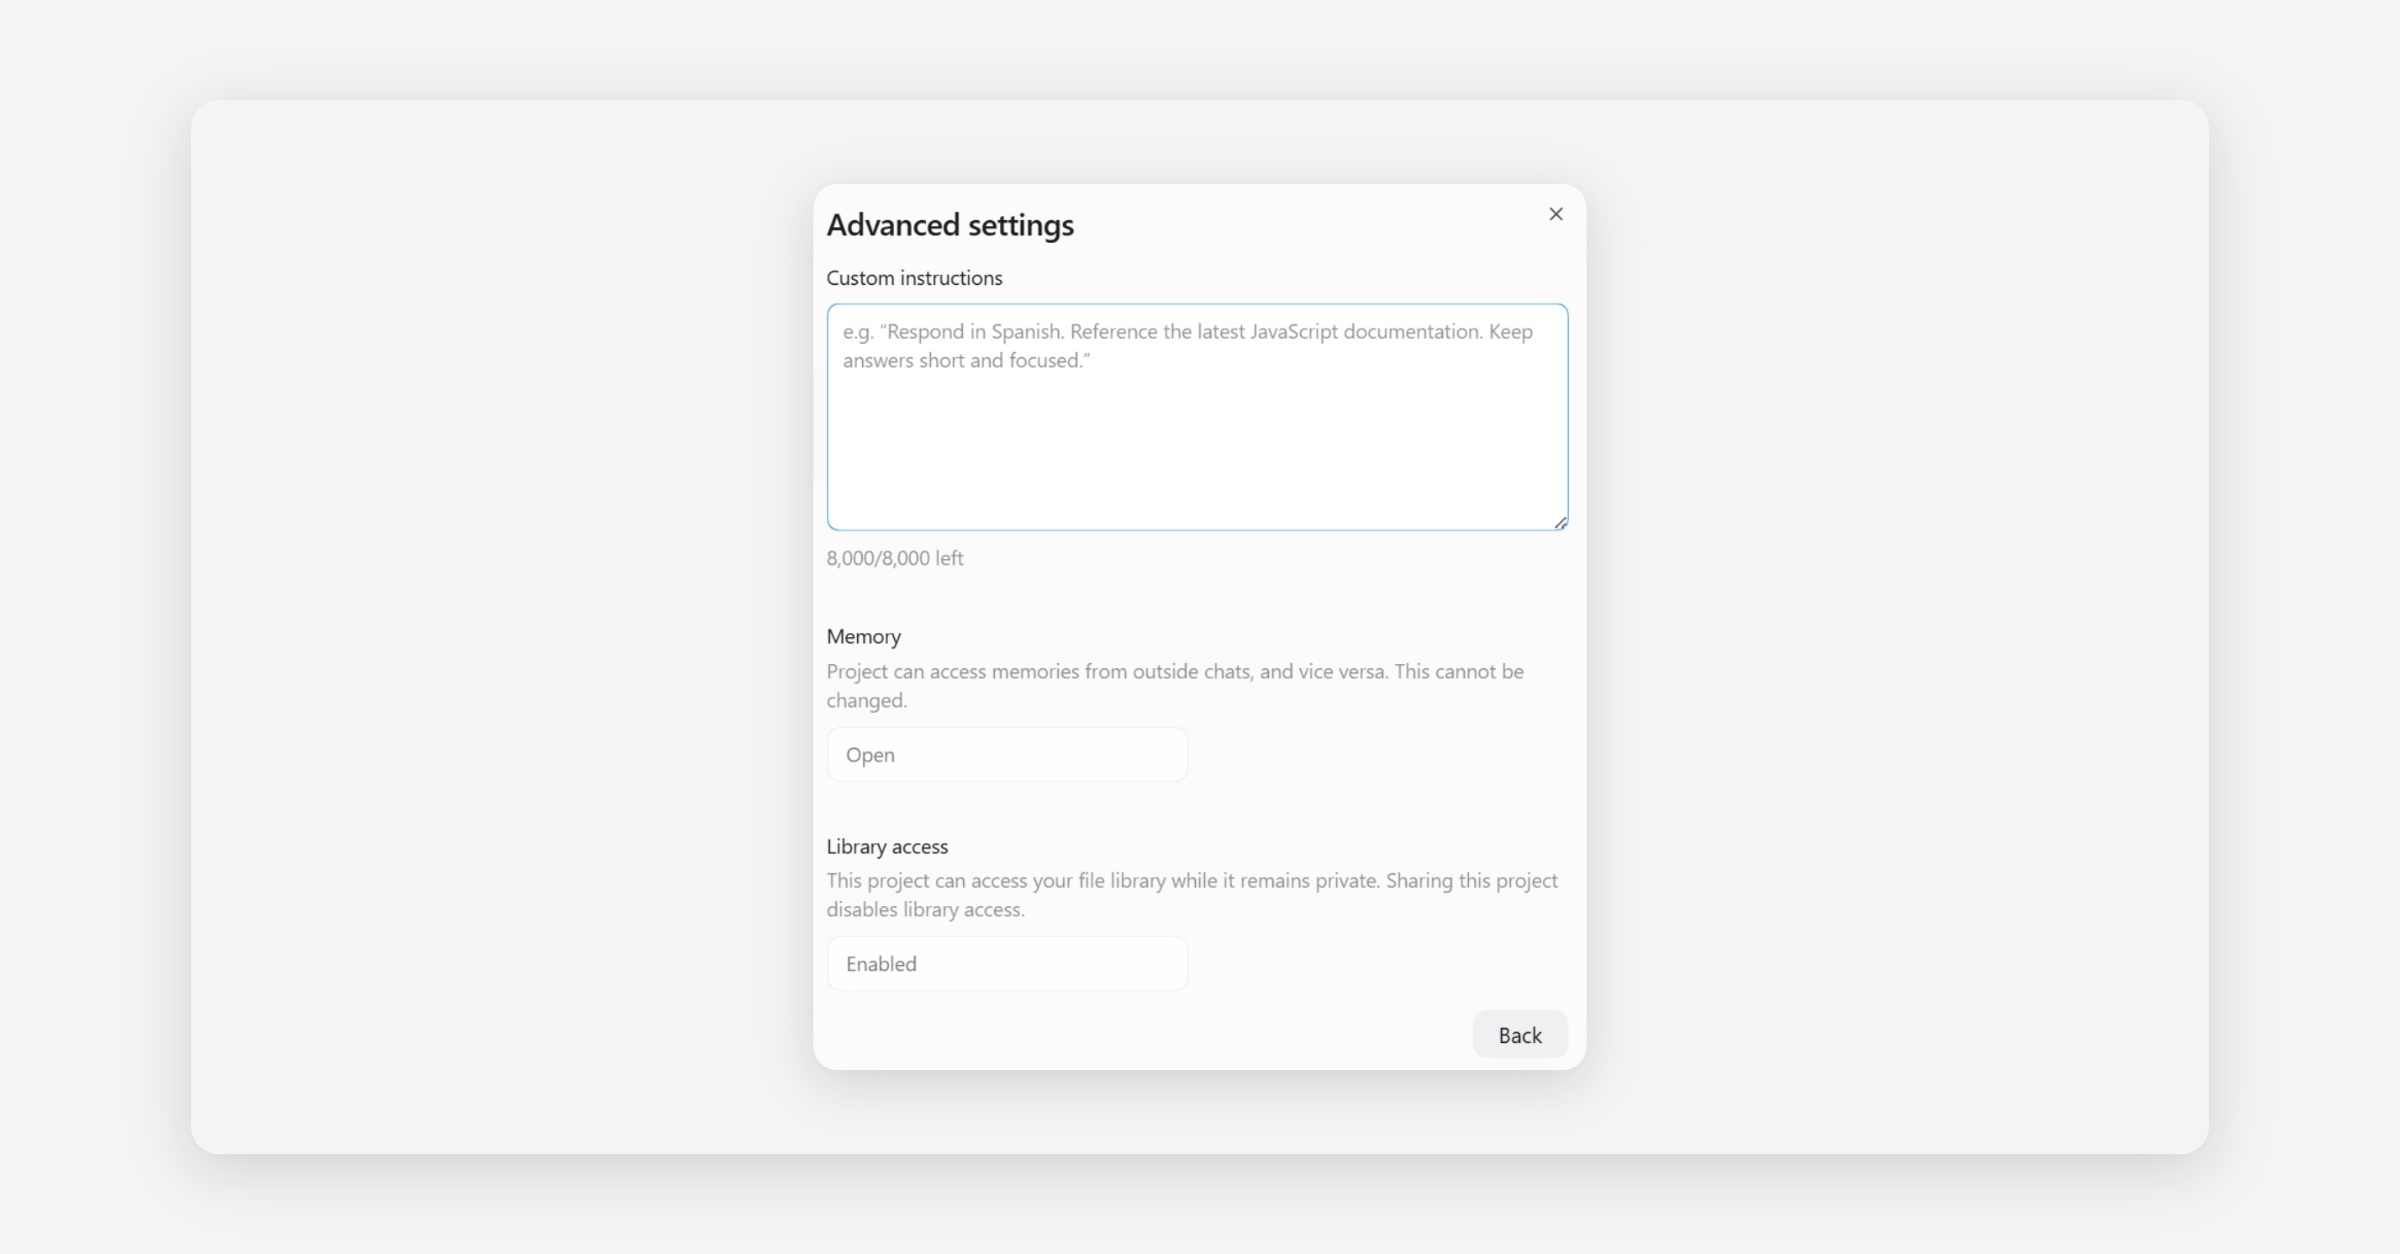
To add custom instructions to your ChatGPT project, click on ‘Advanced’ in the ‘Project settings’ interface. Enter your instructions within the ‘Custom Instructions’ box on the ‘Advanced settings’ interface that appears (see 3rd image in group below).
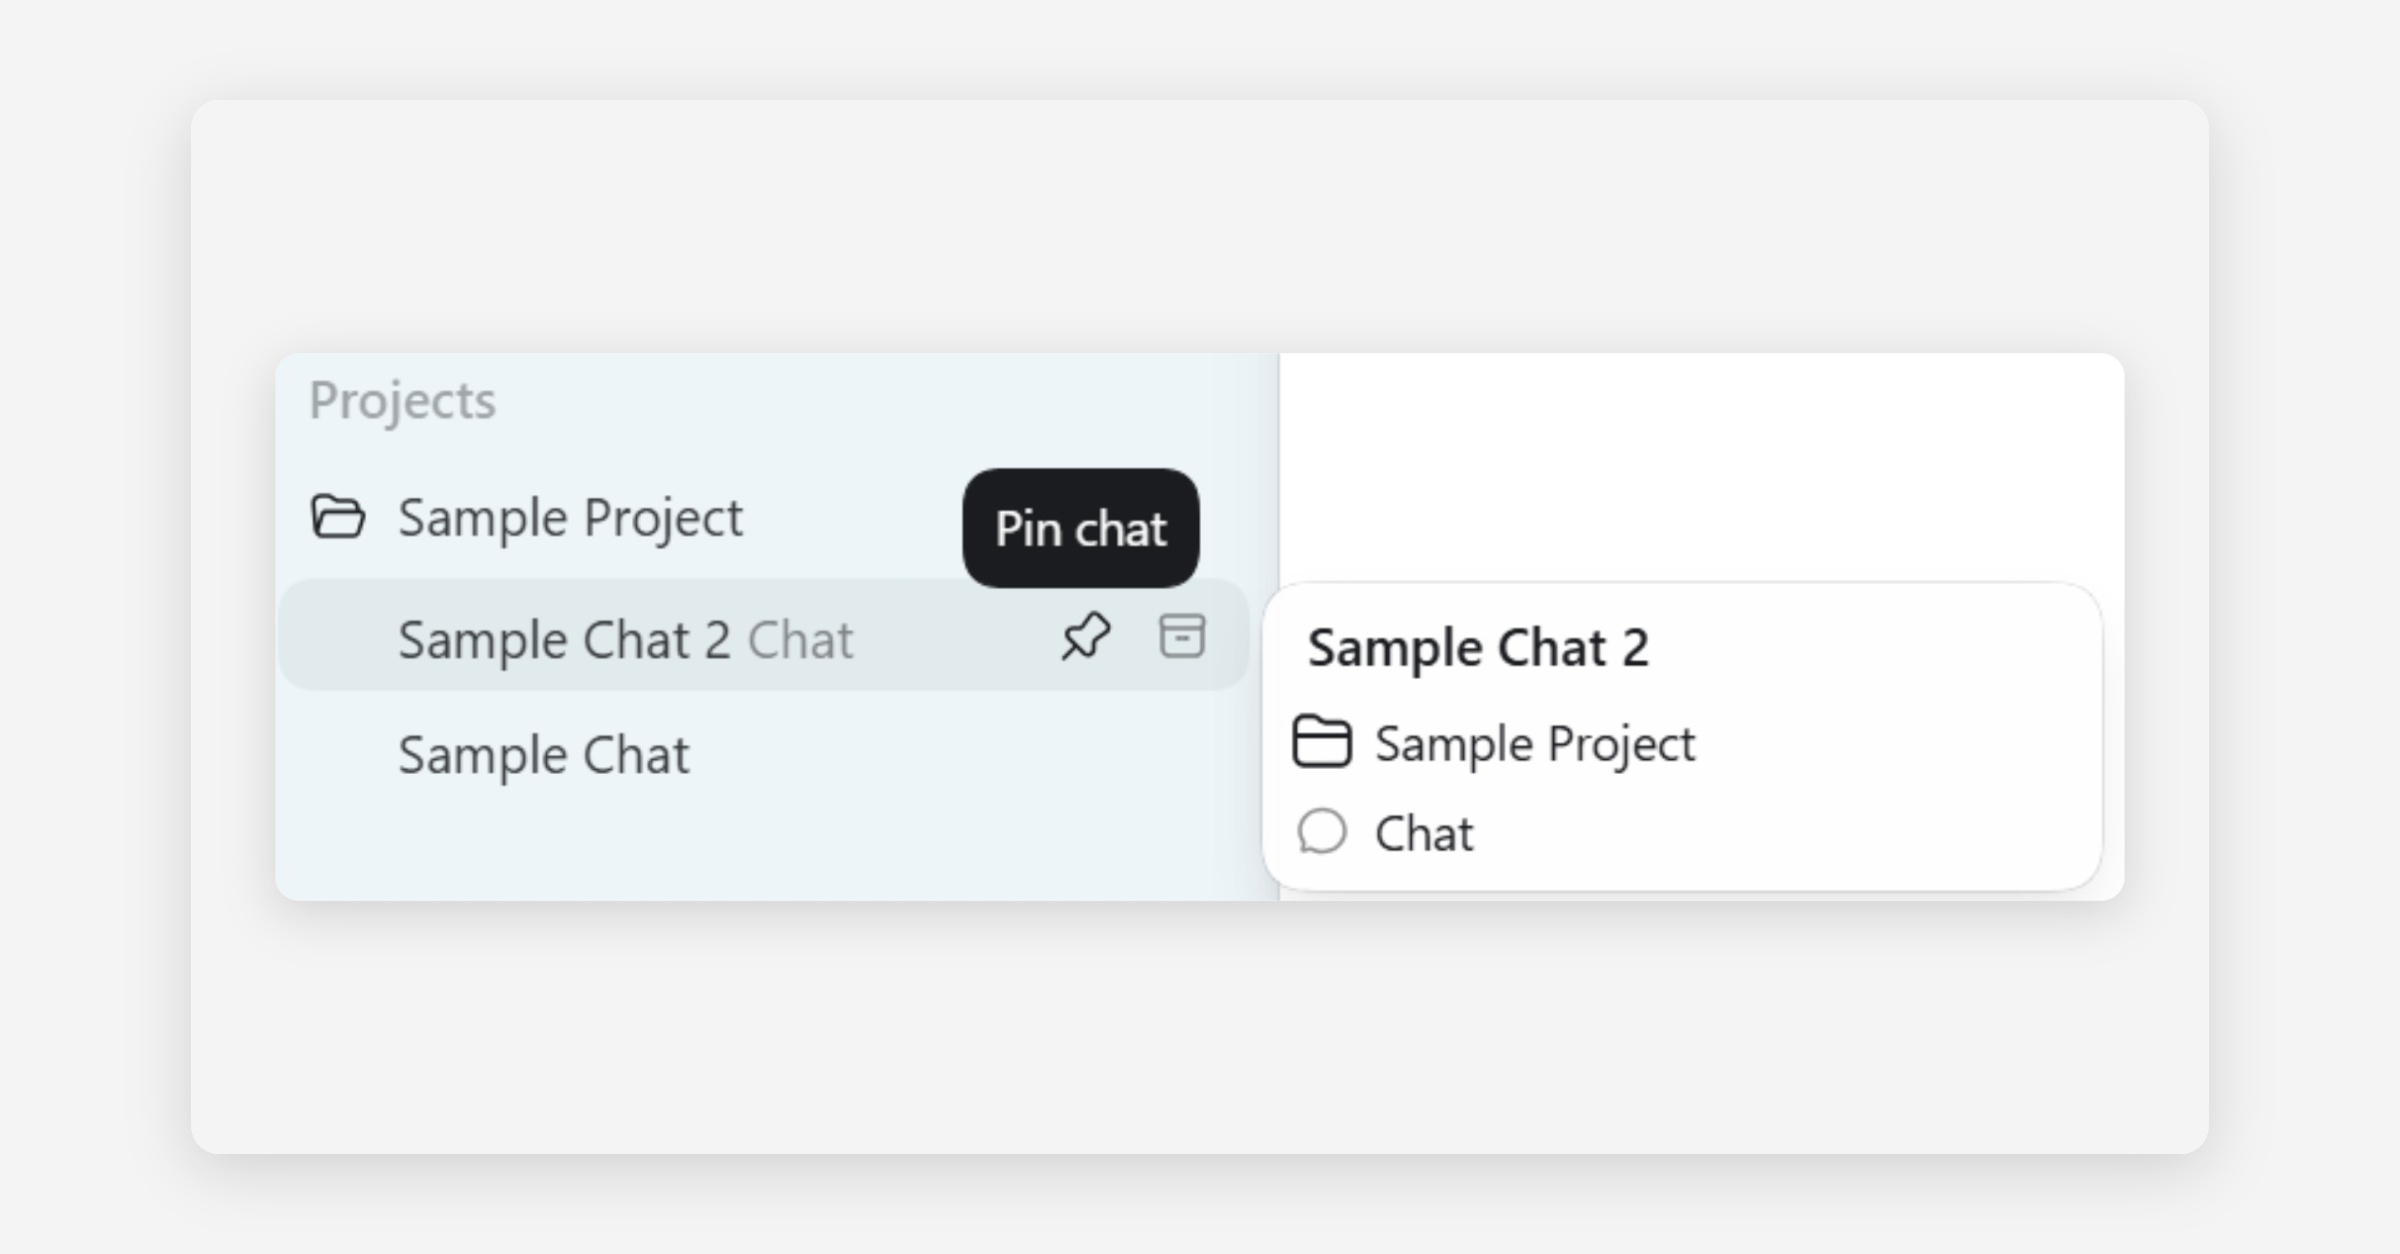
Add chat-specific files using the ‘+’ within the designated chat. Navigate between project chats by selecting your preferred chat in the left sidebar (see bottom image in group below). Pin a chat by selecting the pin icon next to that chat.
Was this helpful?