How to create projects — and why they matter
Projects are dedicated, self-contained workspaces that can be shared with colleagues, enhancing organization and collaboration.
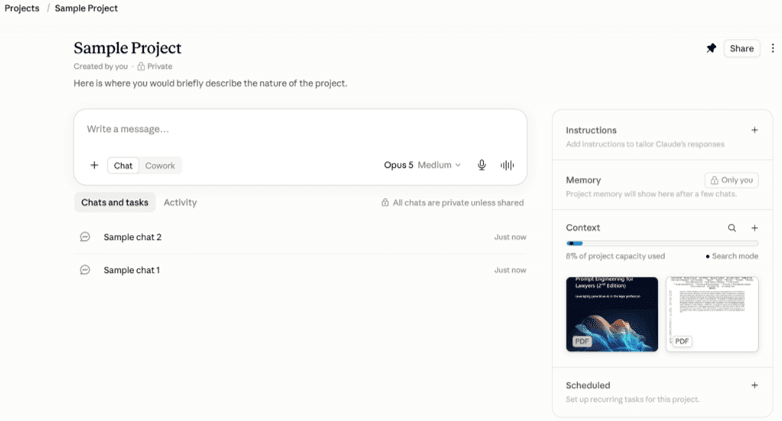
Features of a Project
A project comprises the broad instructions you have provided, the context documents you have uploaded, and the distinct chats you have begun within it. These features are visible within the project. Projects are valuable assets for individuals and teams wishing to collaborate within AI platforms.
Instructions tailor the LLM’s behavior and responses, allowing you to control tone, the perspective from which the LLM answers, and the LLM’s reasoning process.
Context documents inform the LLM’s search and synthesis efforts. Documents used throughout a project should be uploaded into the project’s context window rather than into a specific chat.
A chat harnesses the information in the project’s context window and the chat’s conversation history. Its context window is unique from those of other chats within the project. Consider opening new chats for separate tasks within a project to avoid overloading one chat’s context window.
Setting up your Project
Though the User Interface may vary by appearance when creating projects in different LLMs, the basic set-up procedure and the capabilities of projects are largely uniform across providers. The set-up process begins with the creation of the project and subsequently entails uploading documents and providing custom instructions. The guide below details how to set a project up in Claude, ChatGPT, and the GP AI Interface.
Creating a Project in Claude
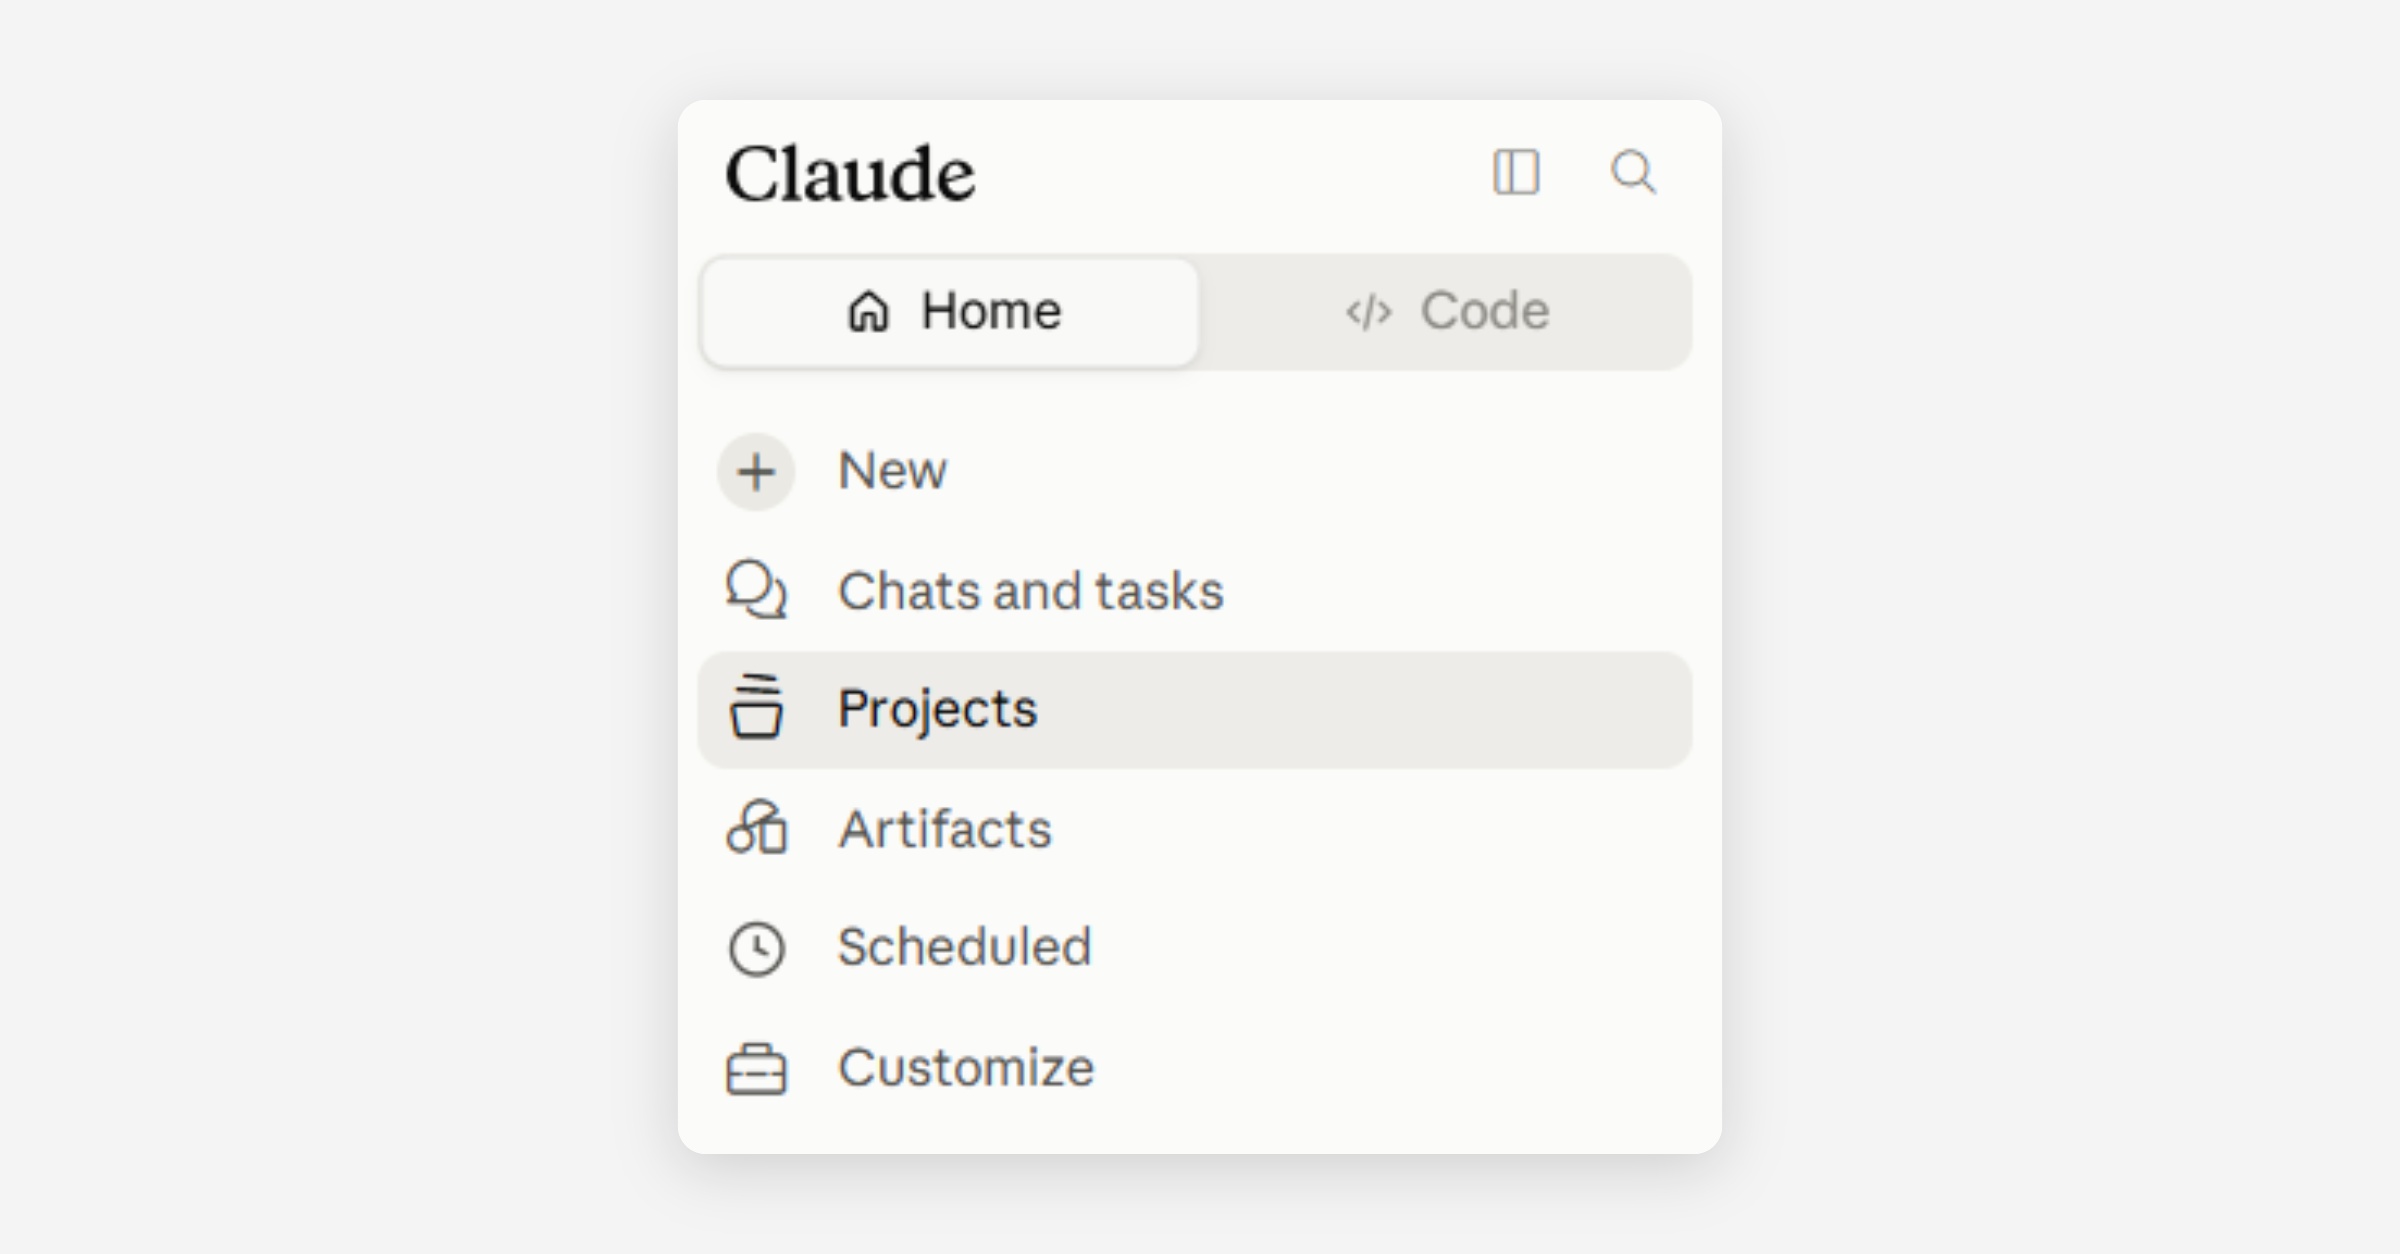
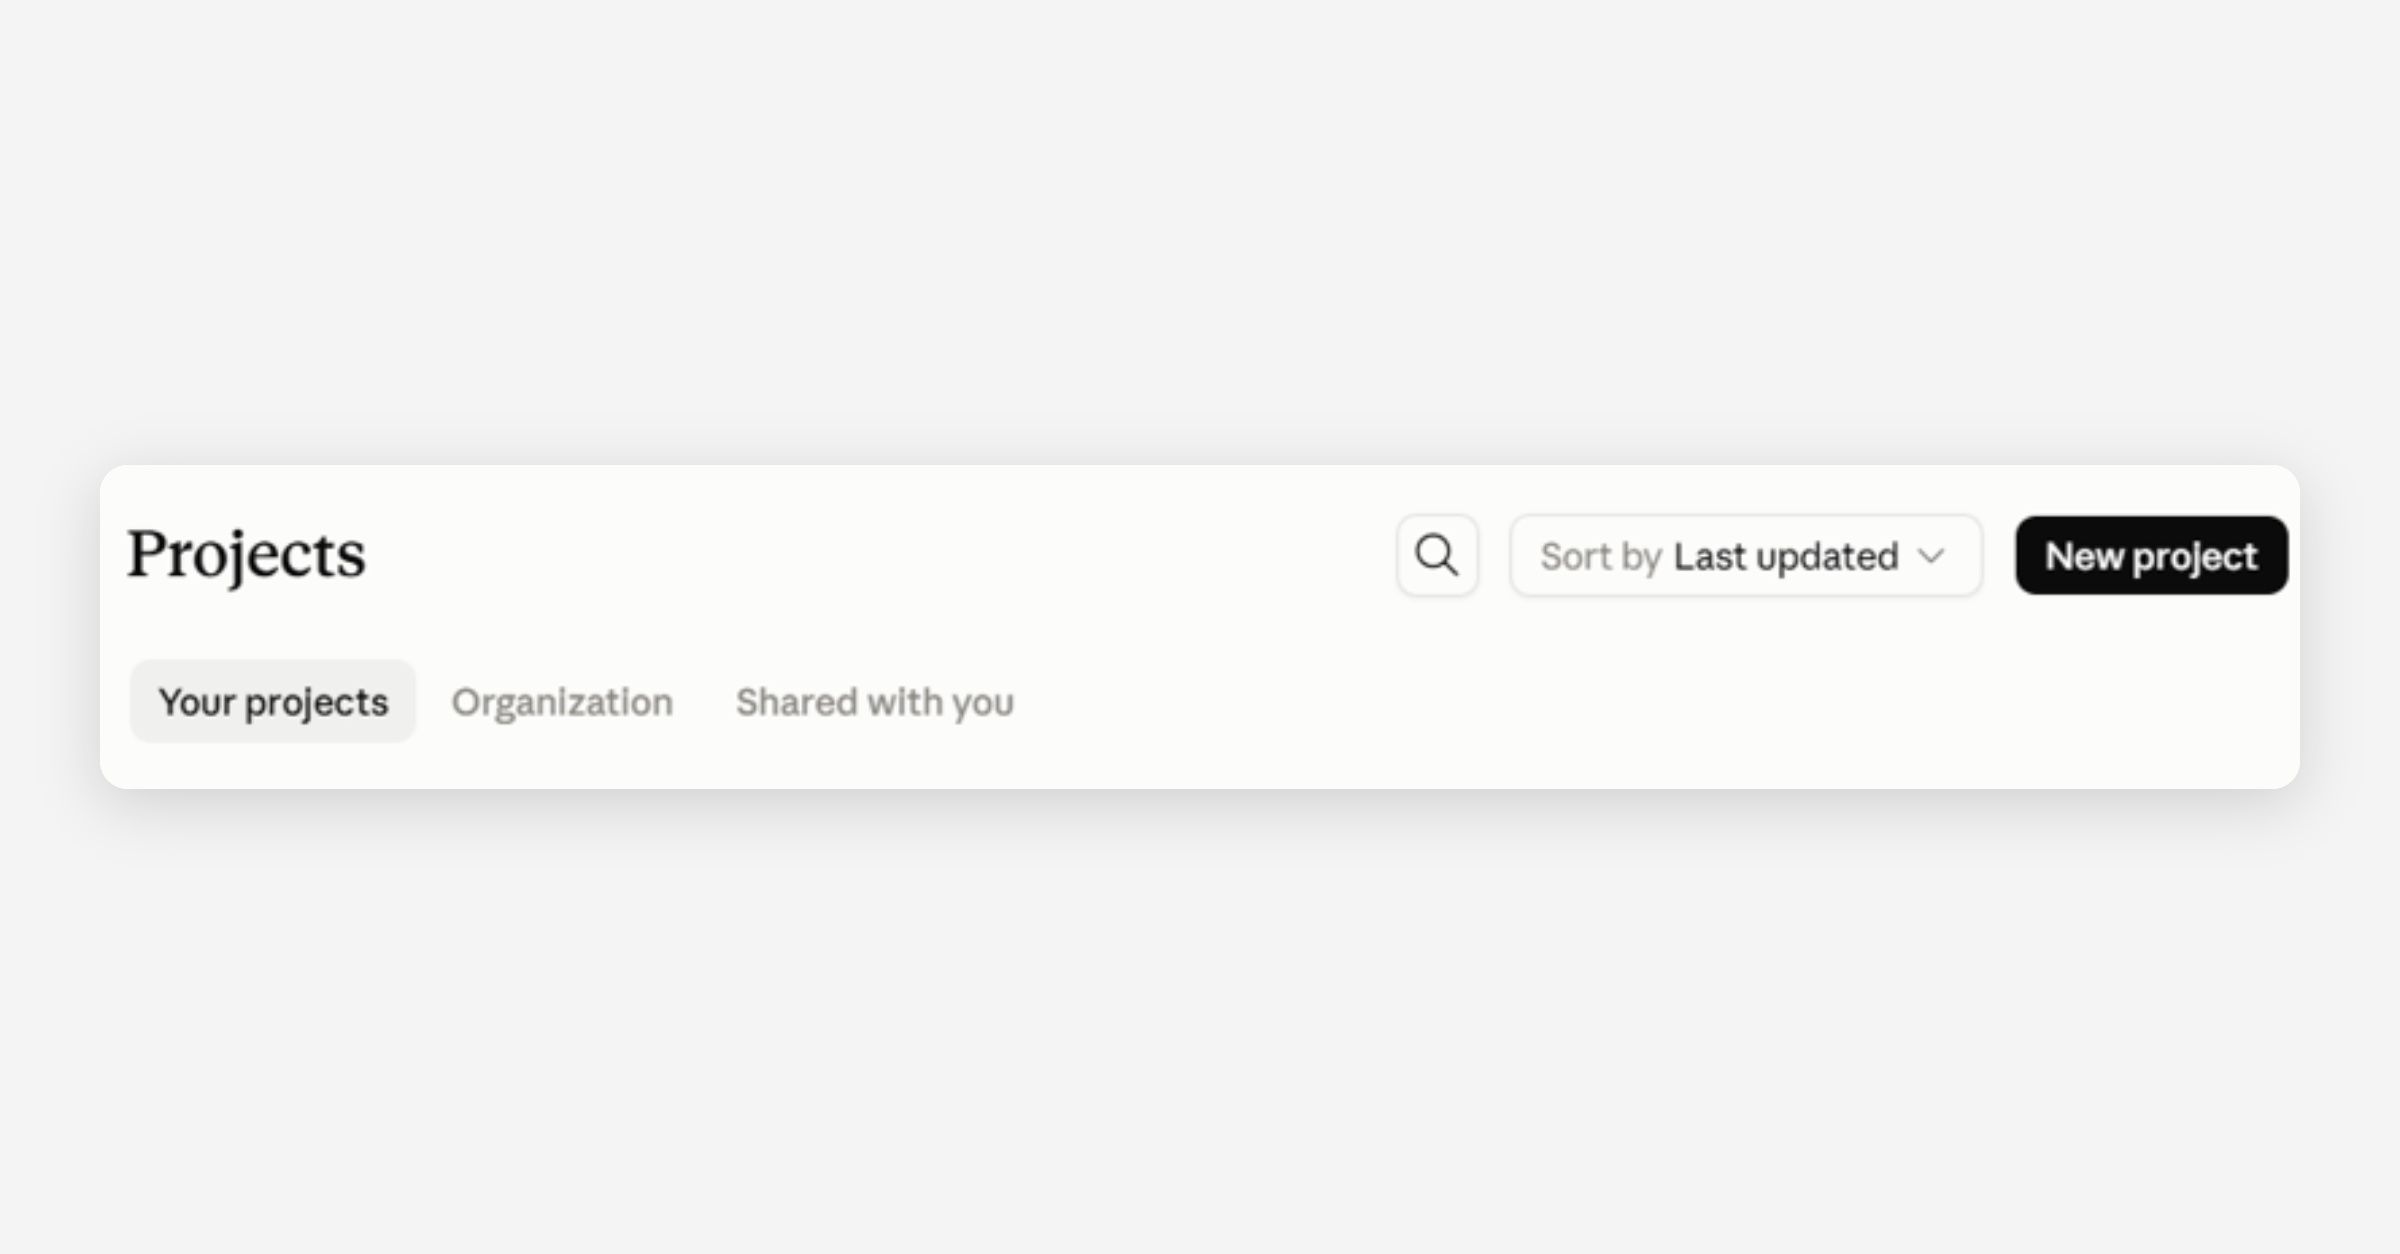
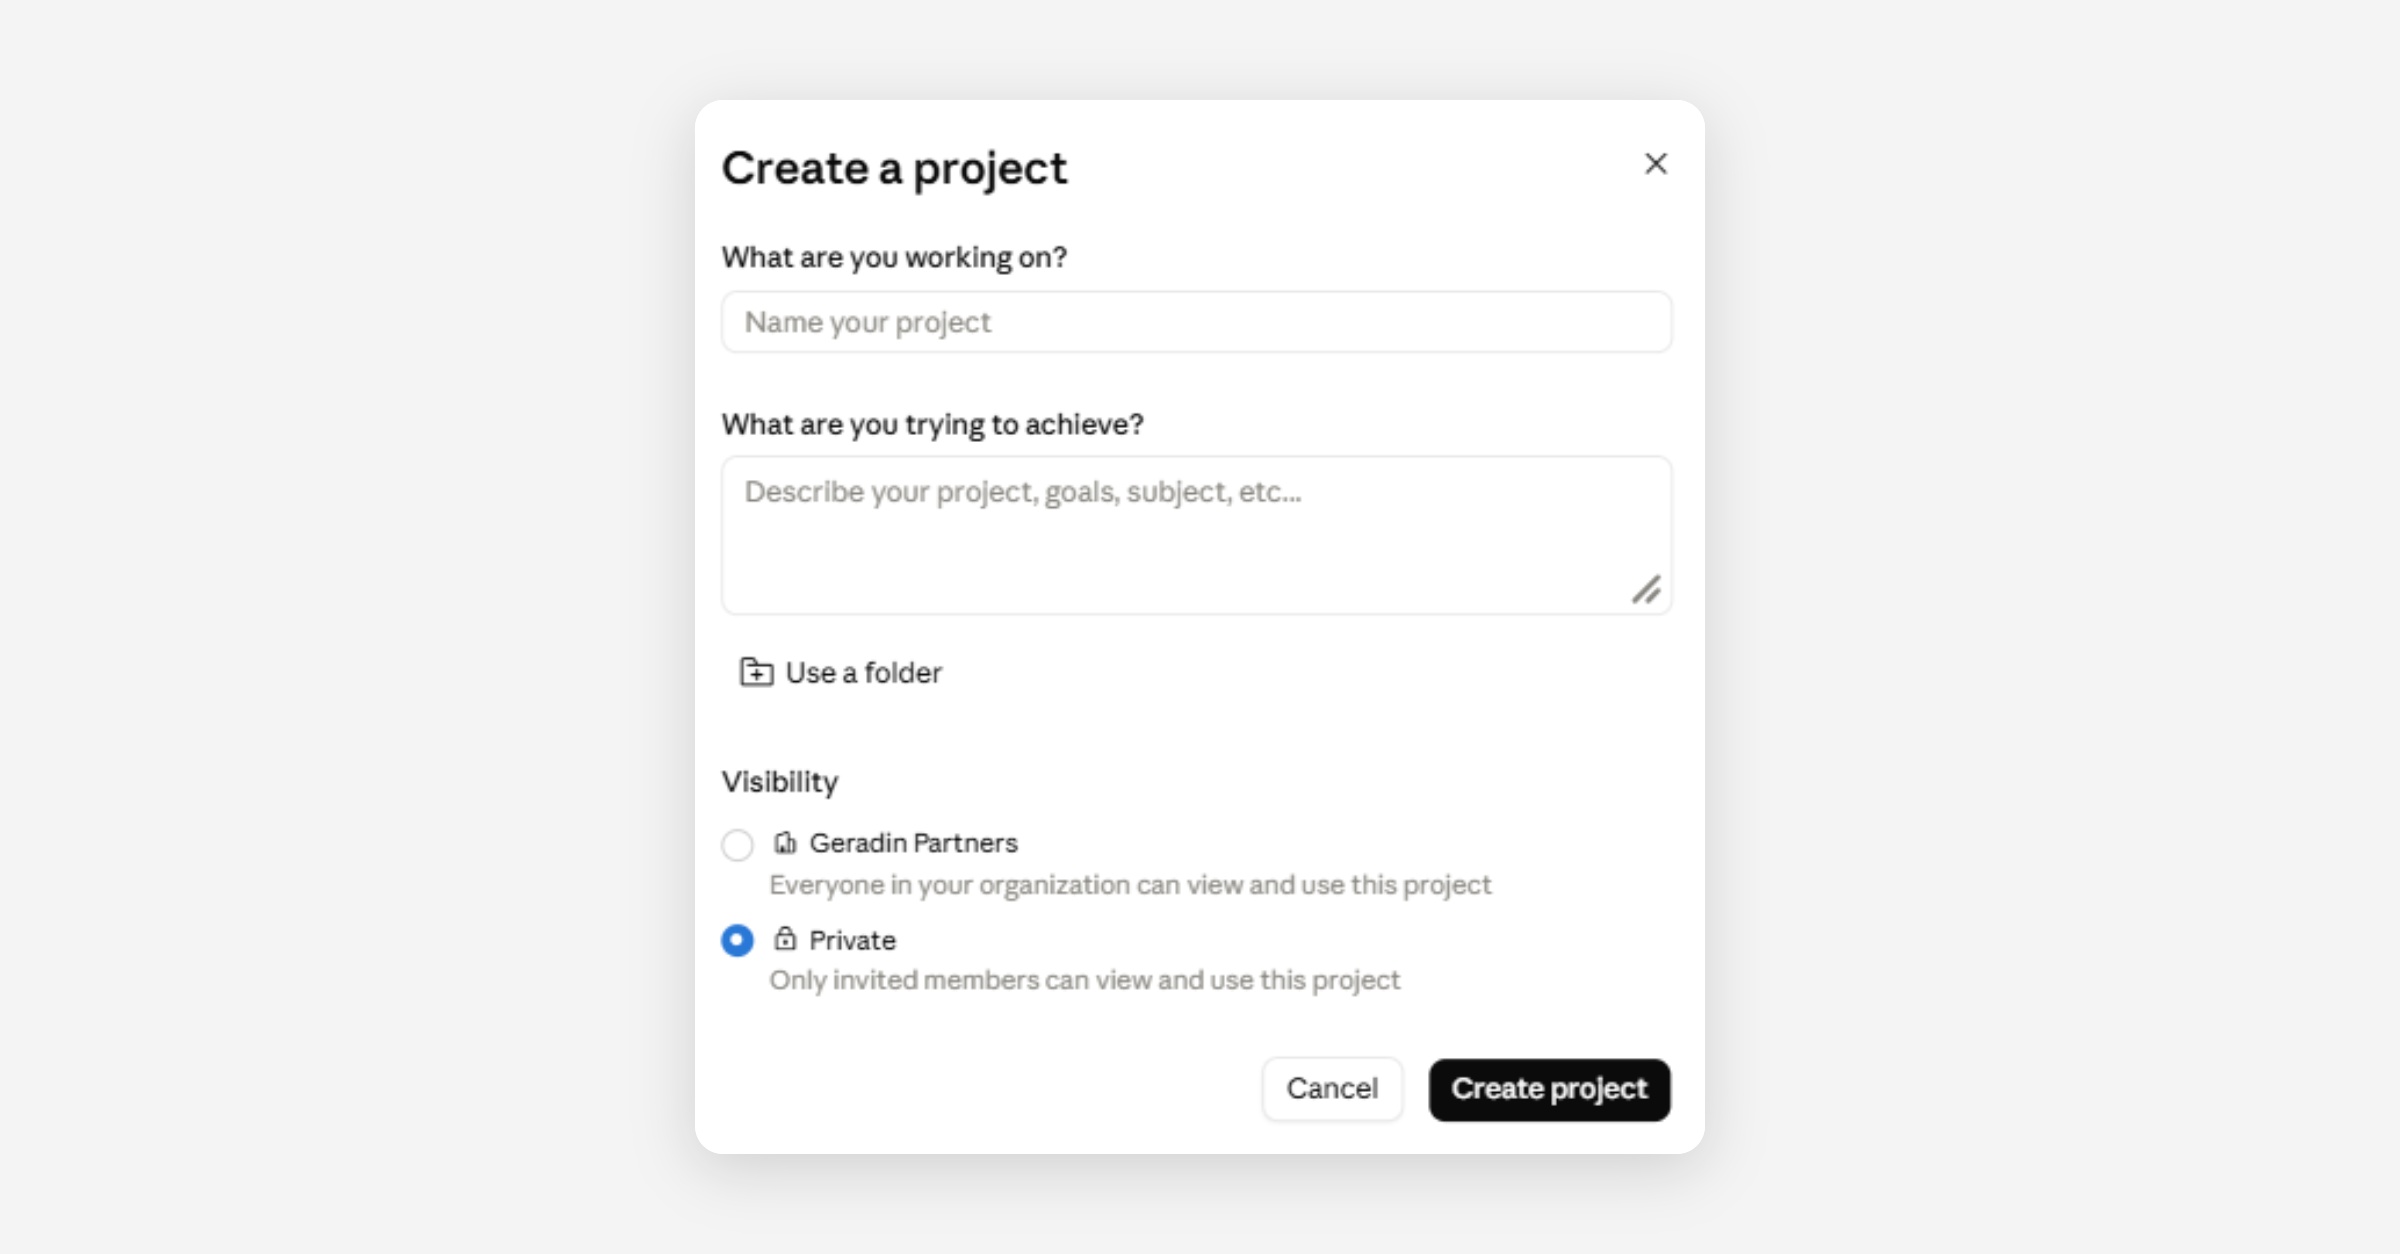
In Claude, click on ‘Projects’ in the left sidebar (top image in trio below), and select ‘New project’ (middle image in trio below). Enter a title and a description, and manage access permissions in the box that appears (bottom image in trio below).
Creating a Project in ChatGPT
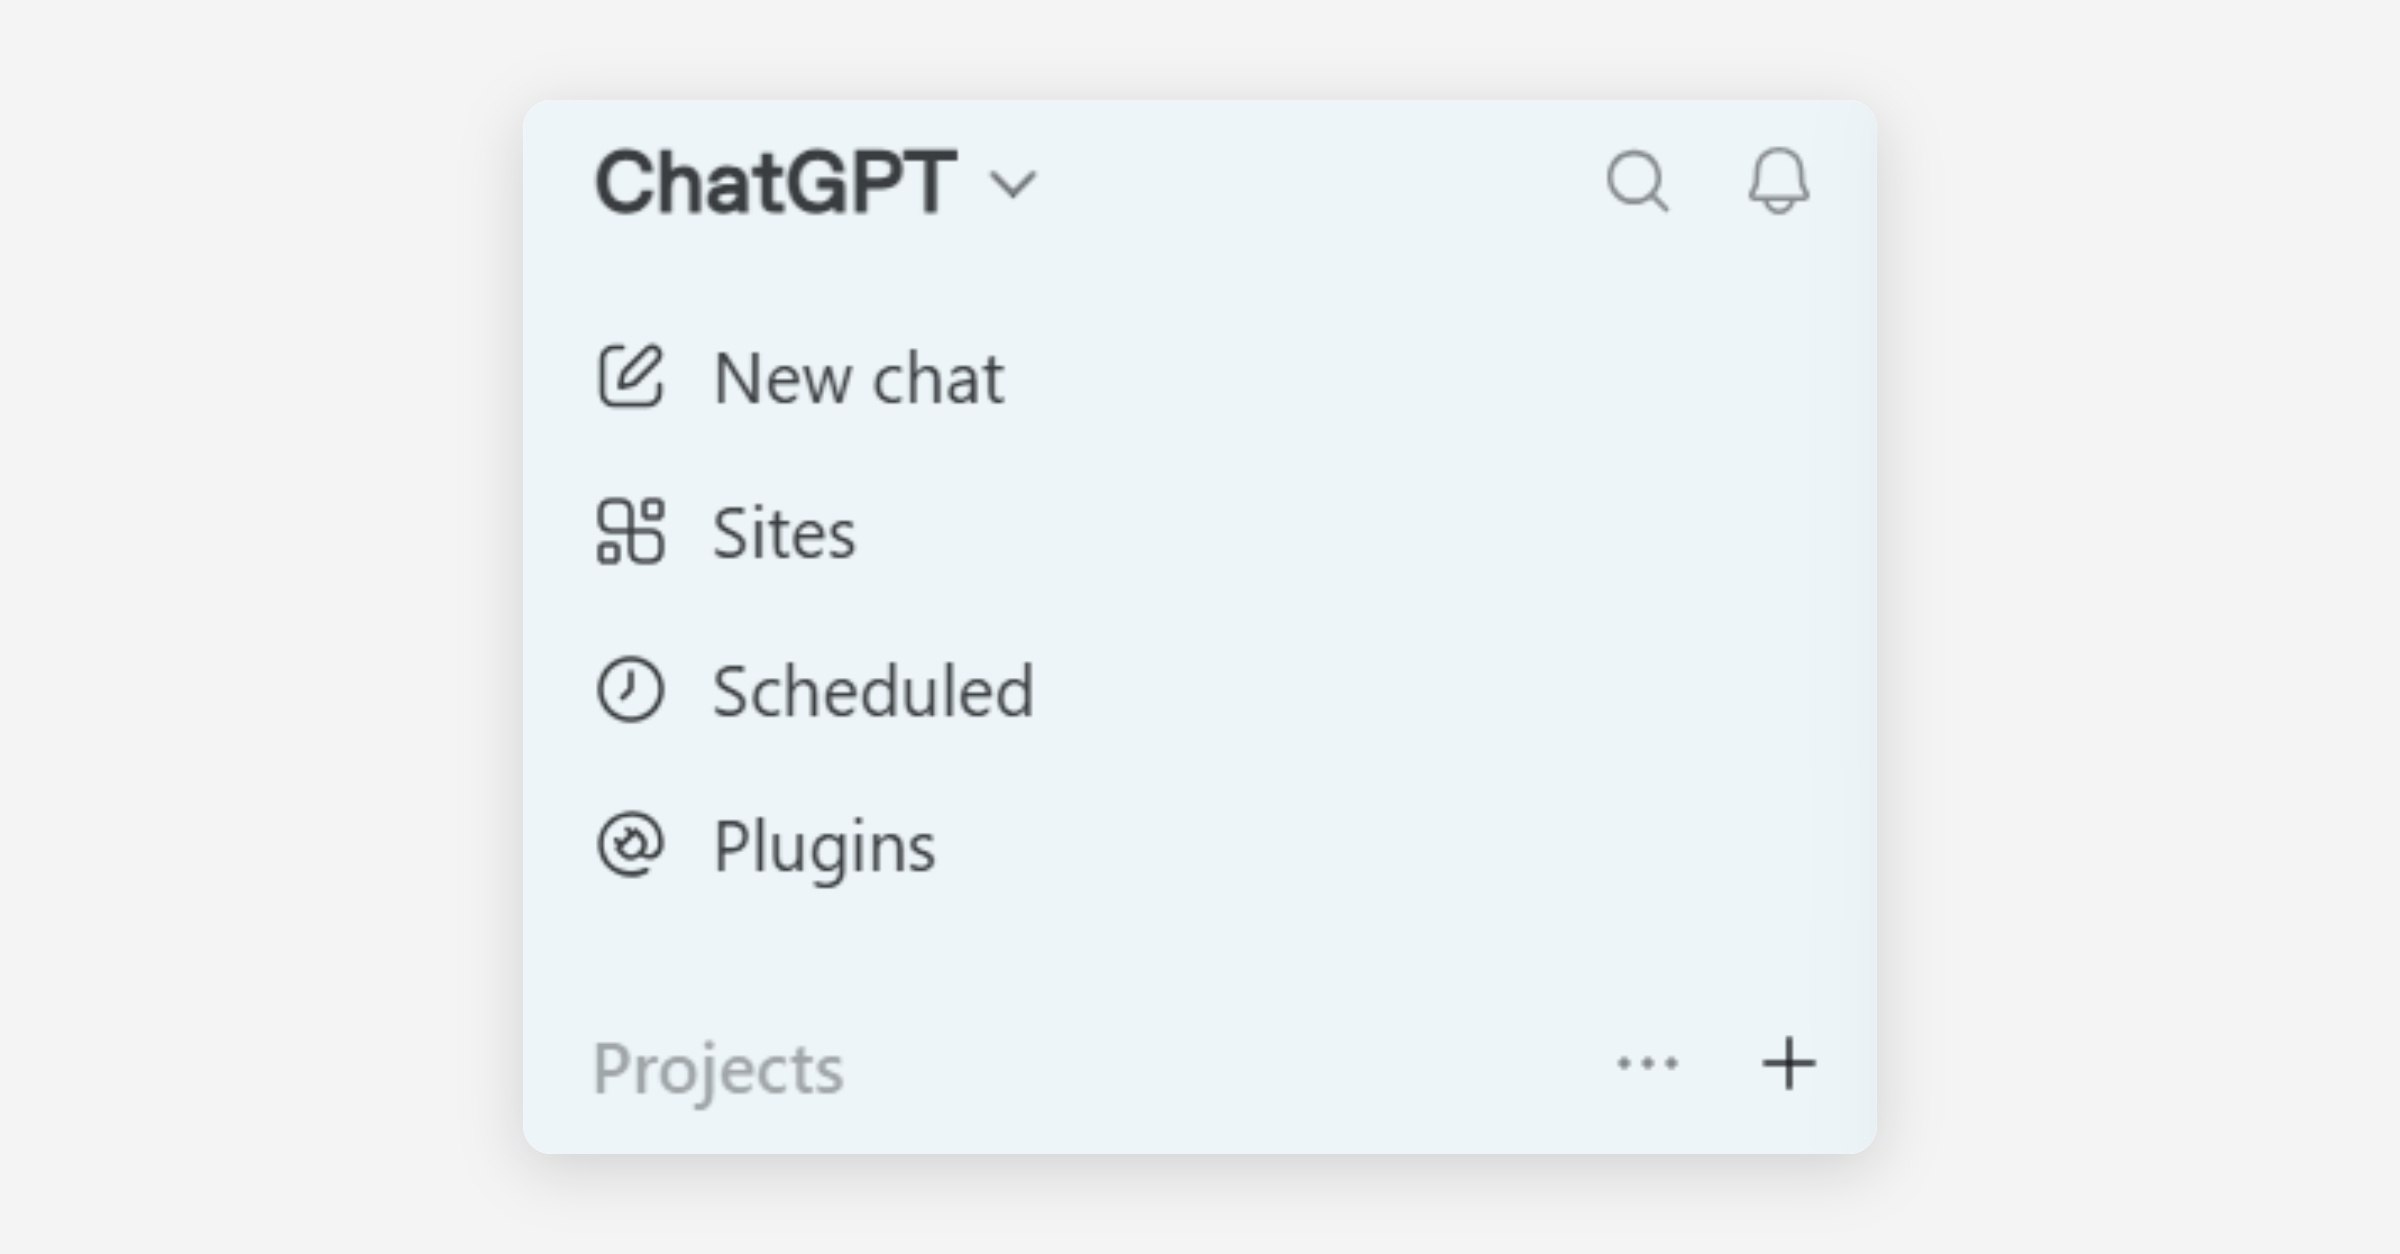
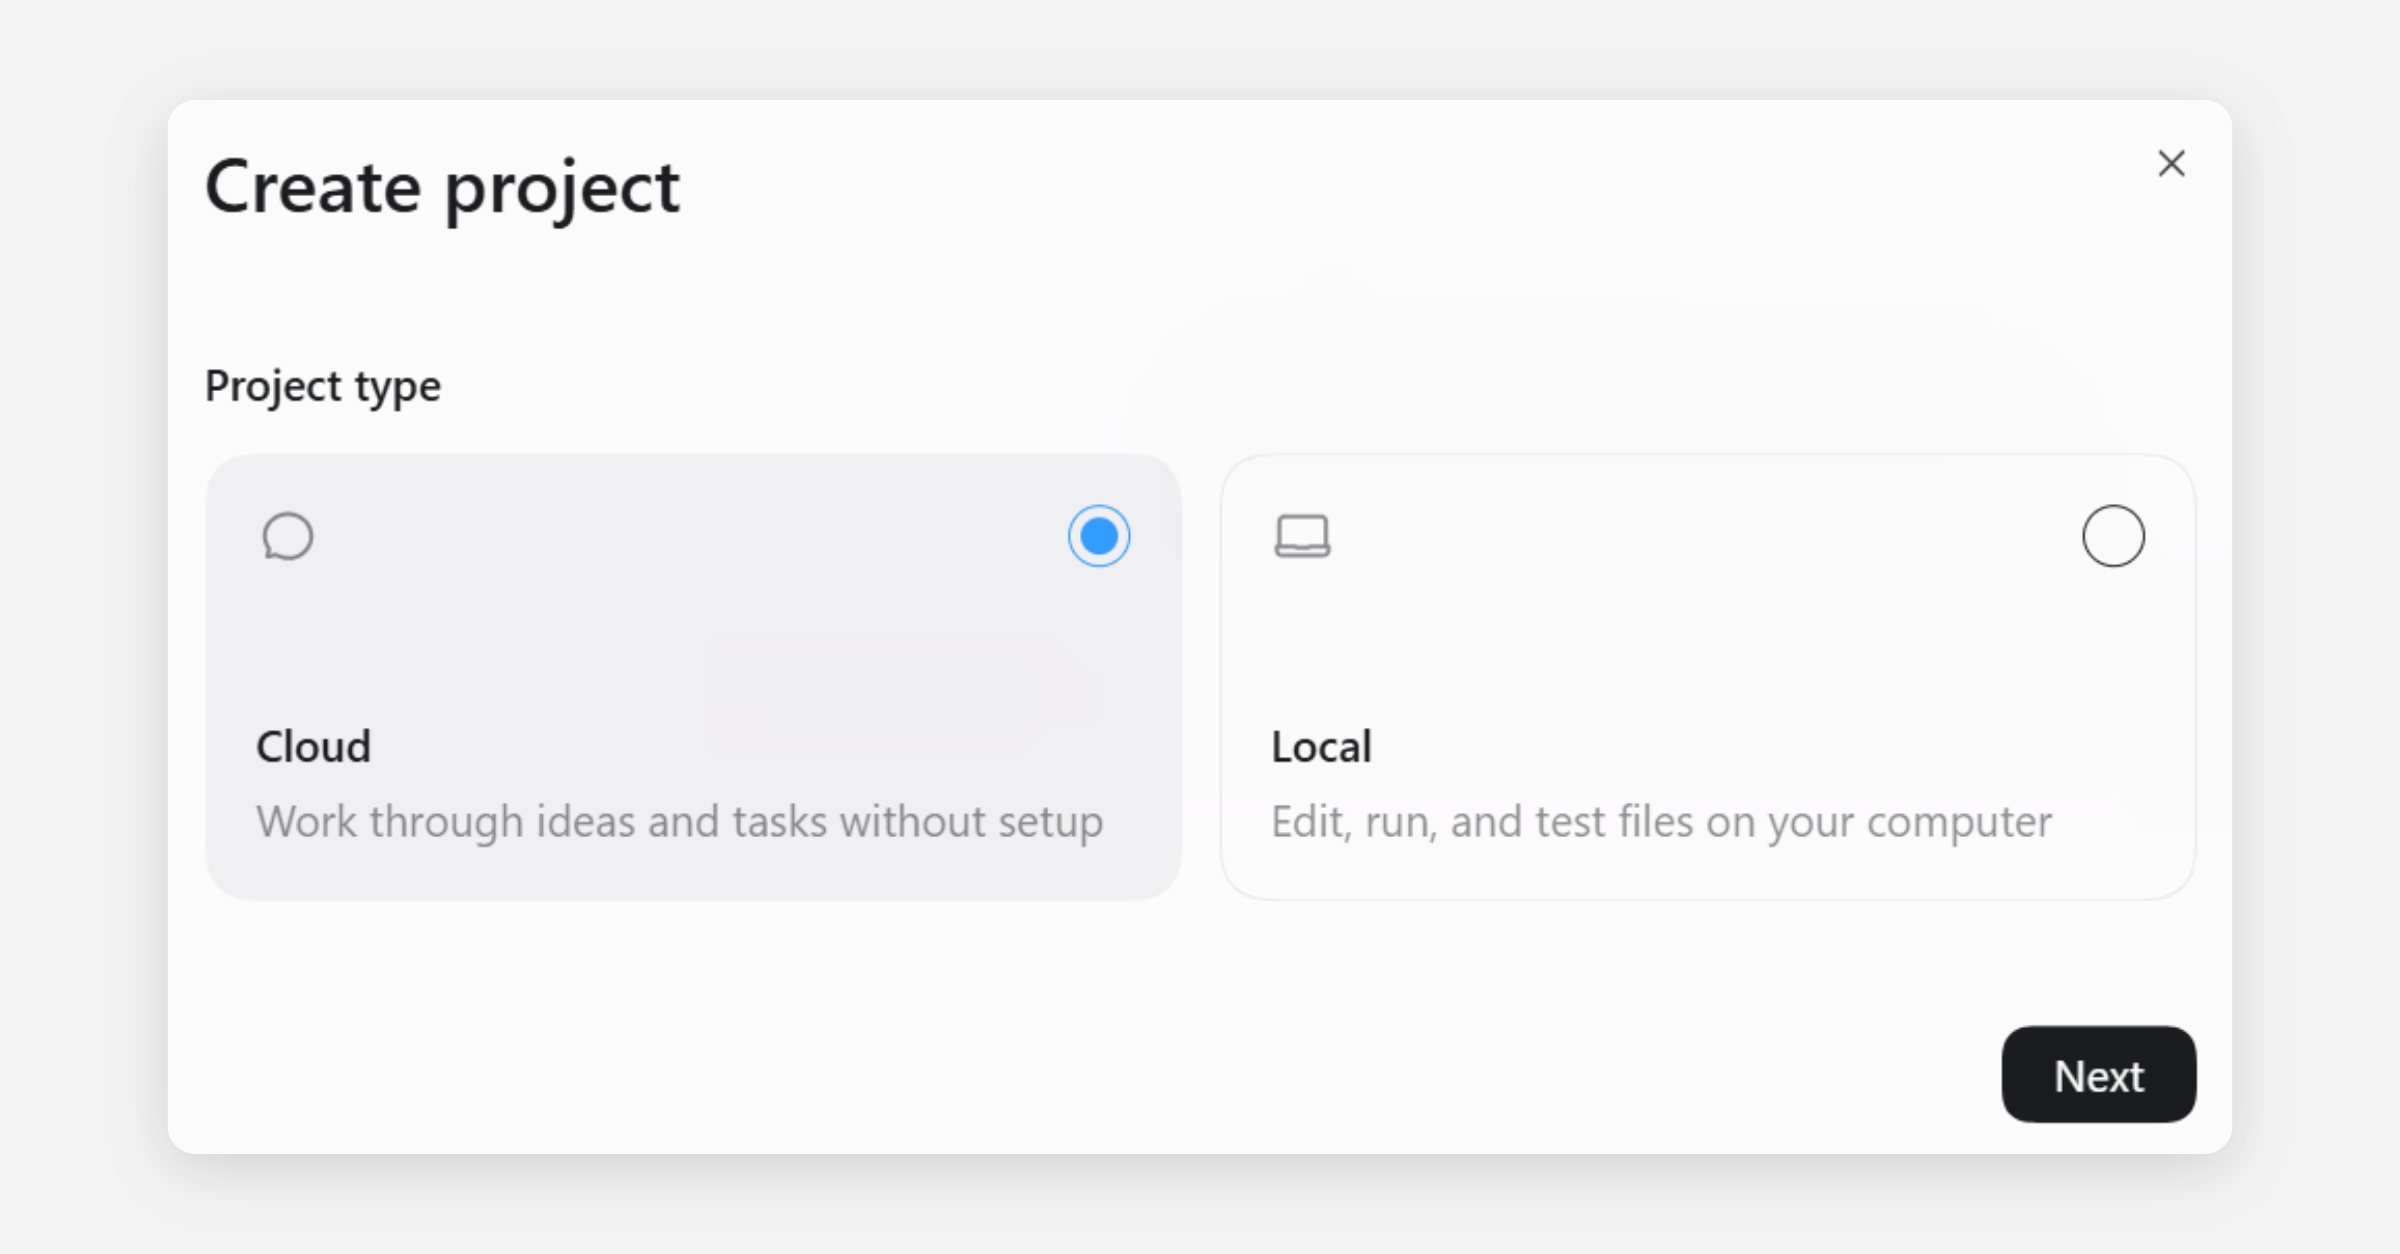
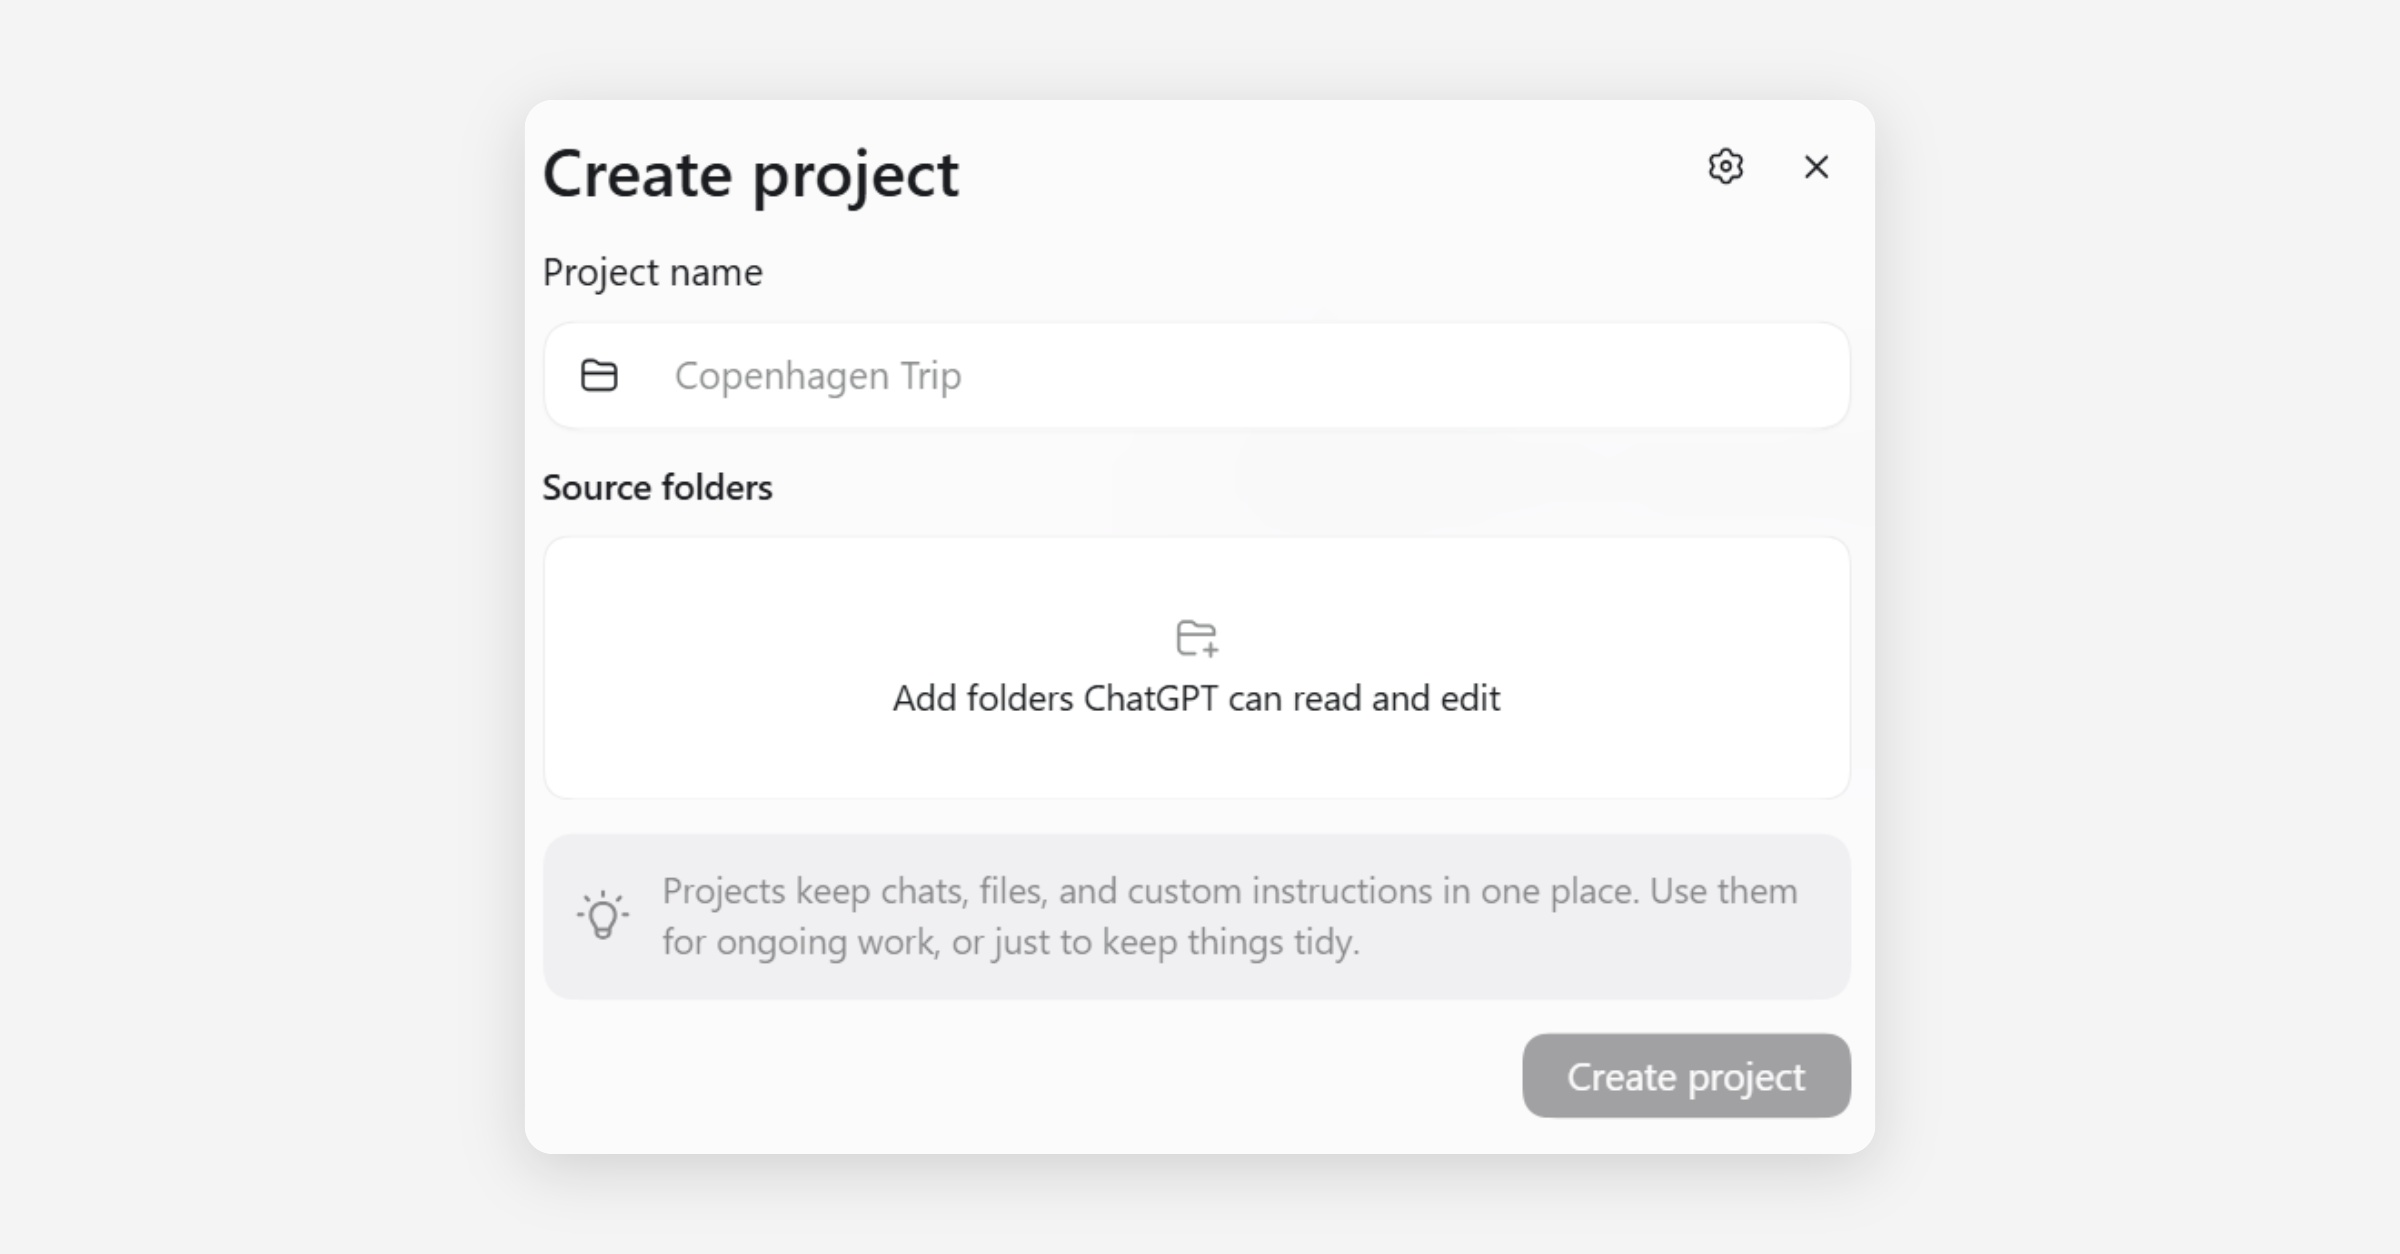
In ChatGPT, click on the ‘+’ next to ‘Projects’ in the left sidebar (top image in trio below). Choose whether you would like to run the project in the cloud or locally (middle image in trio below). Add a title and folders that the project may access (bottom image in trio below).
Creating a Project in the GP AI Interface
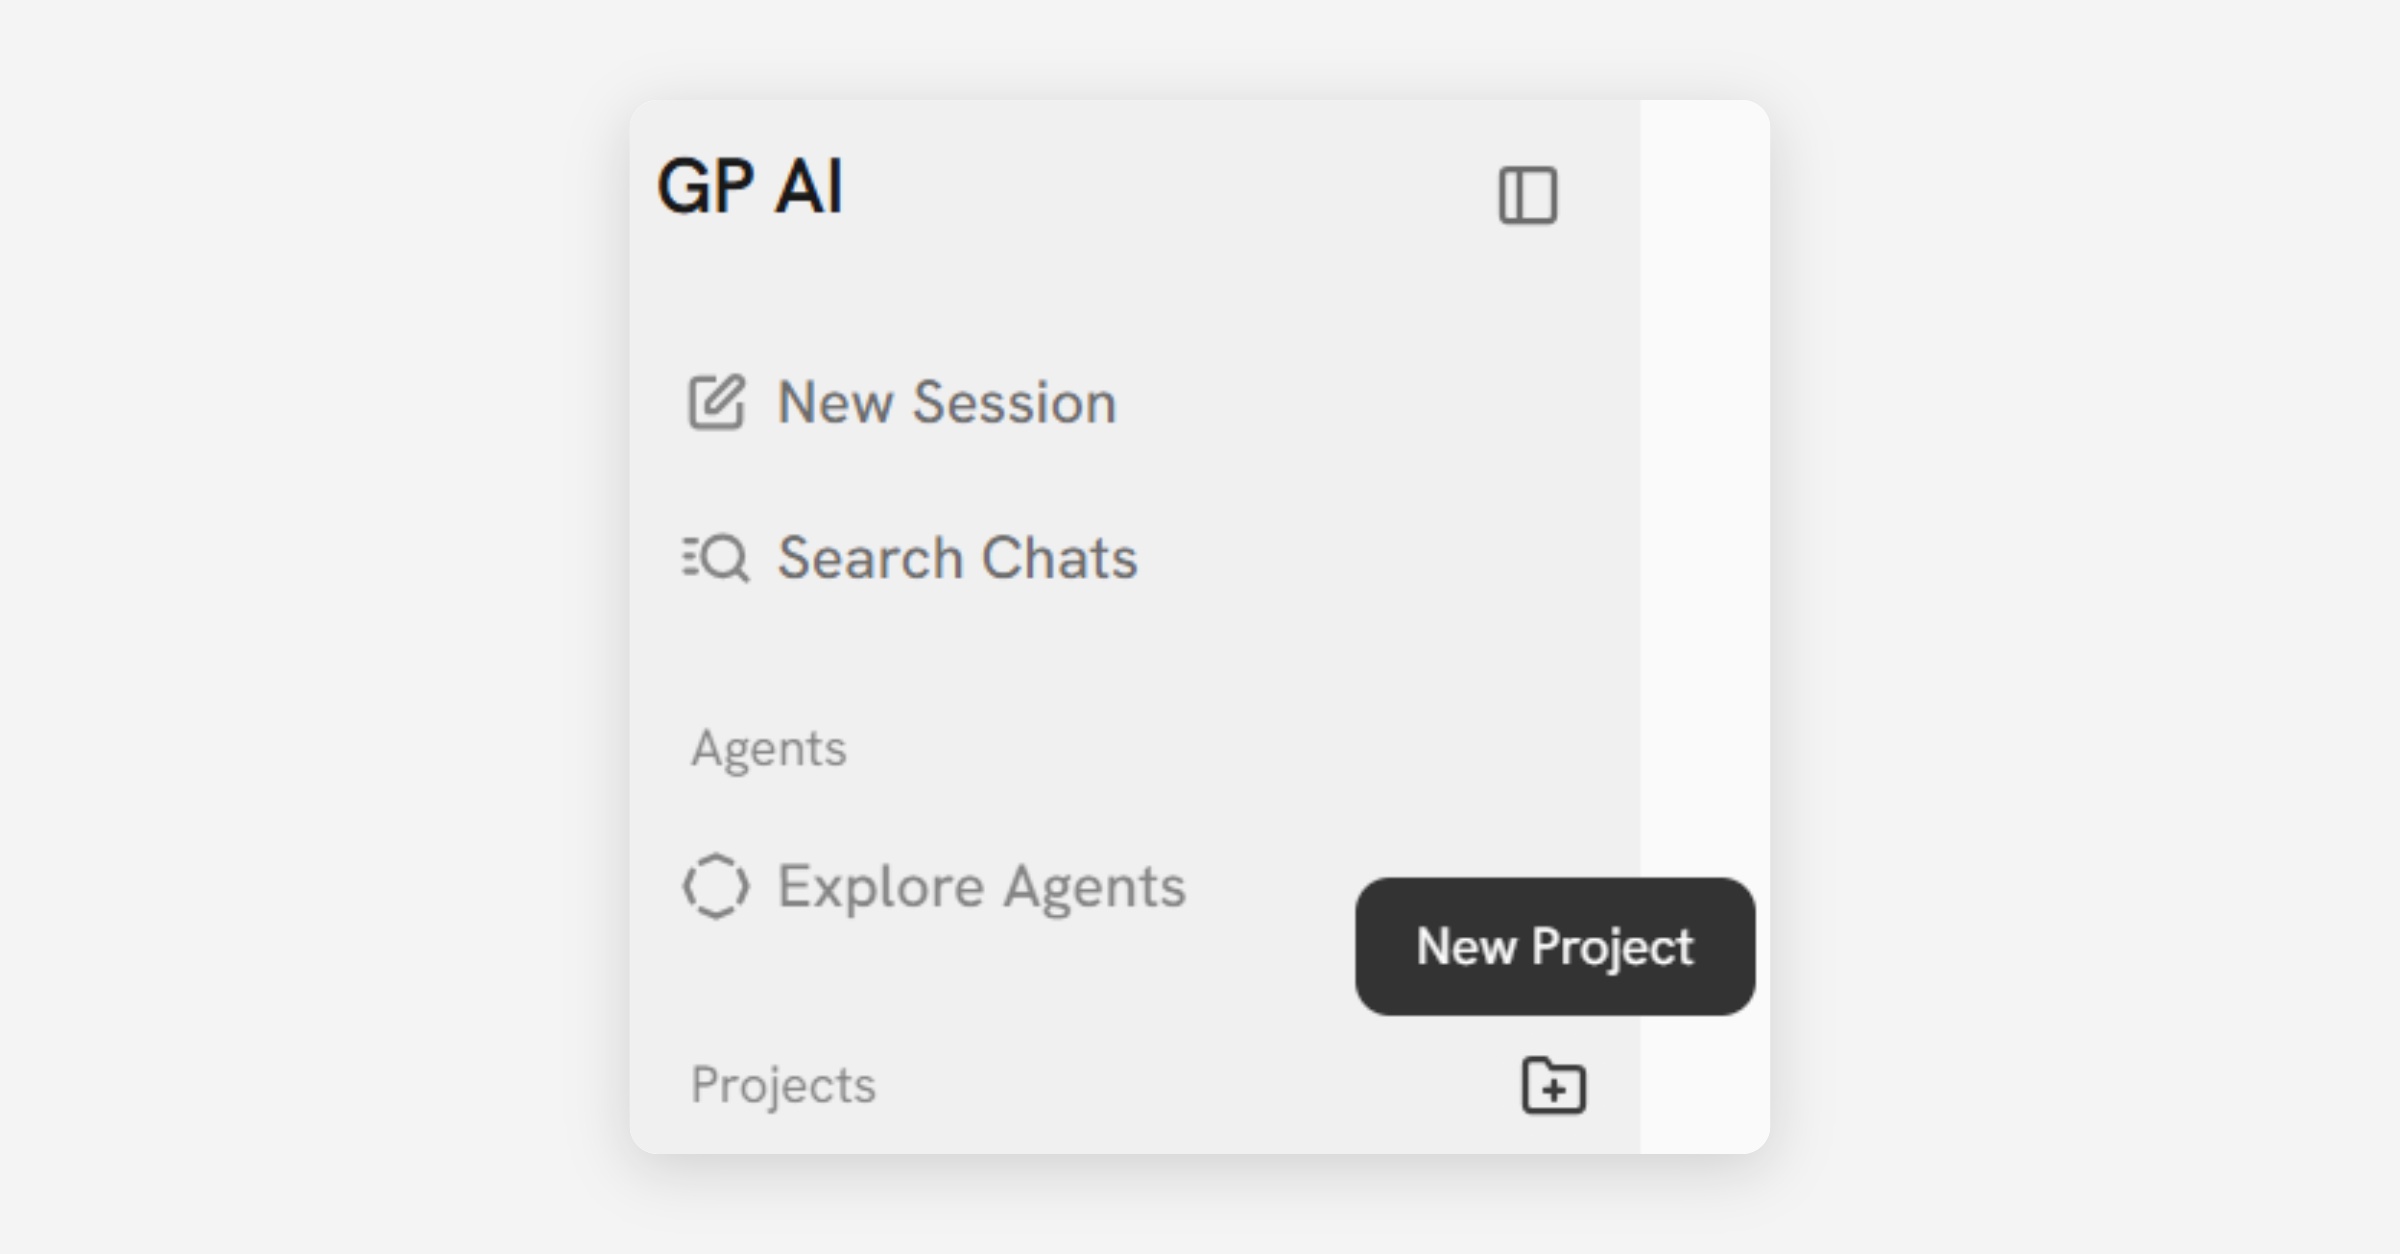
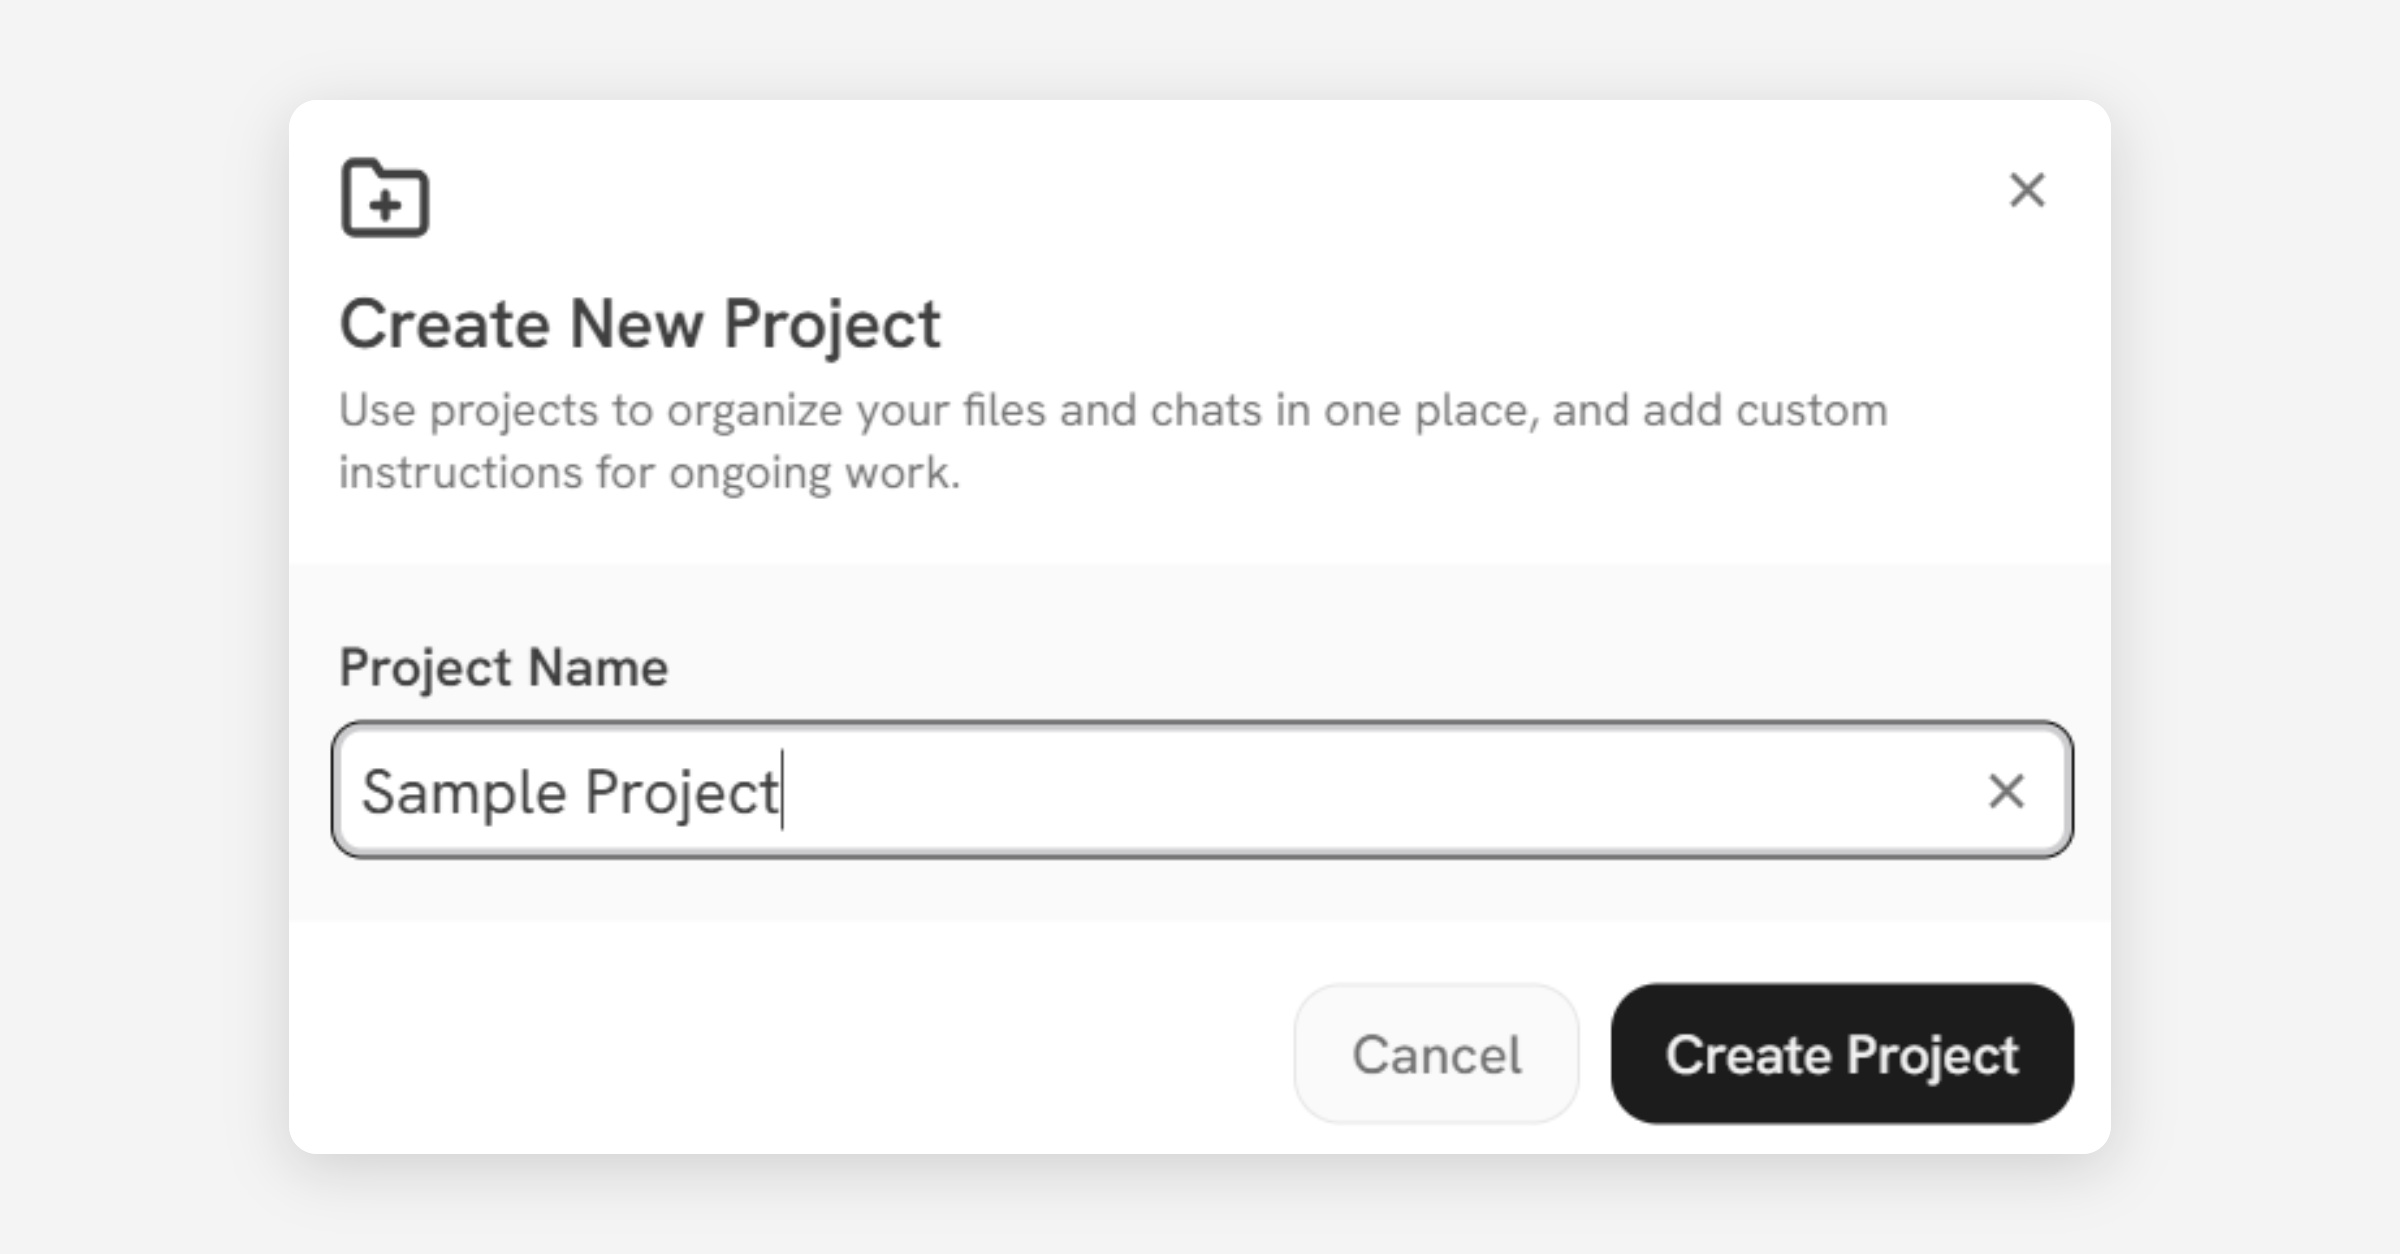
In the GP AI Interface, click on the ‘+’ next to ‘Projects’ in the left sidebar (top image in pair below). Provide a name for your project (bottom image in pair below).
Finishing the Set-up of your Project
Finishing the setup of your project entails providing custom instructions and context that are available across distinct chats.
Finishing Project Set-up in Claude
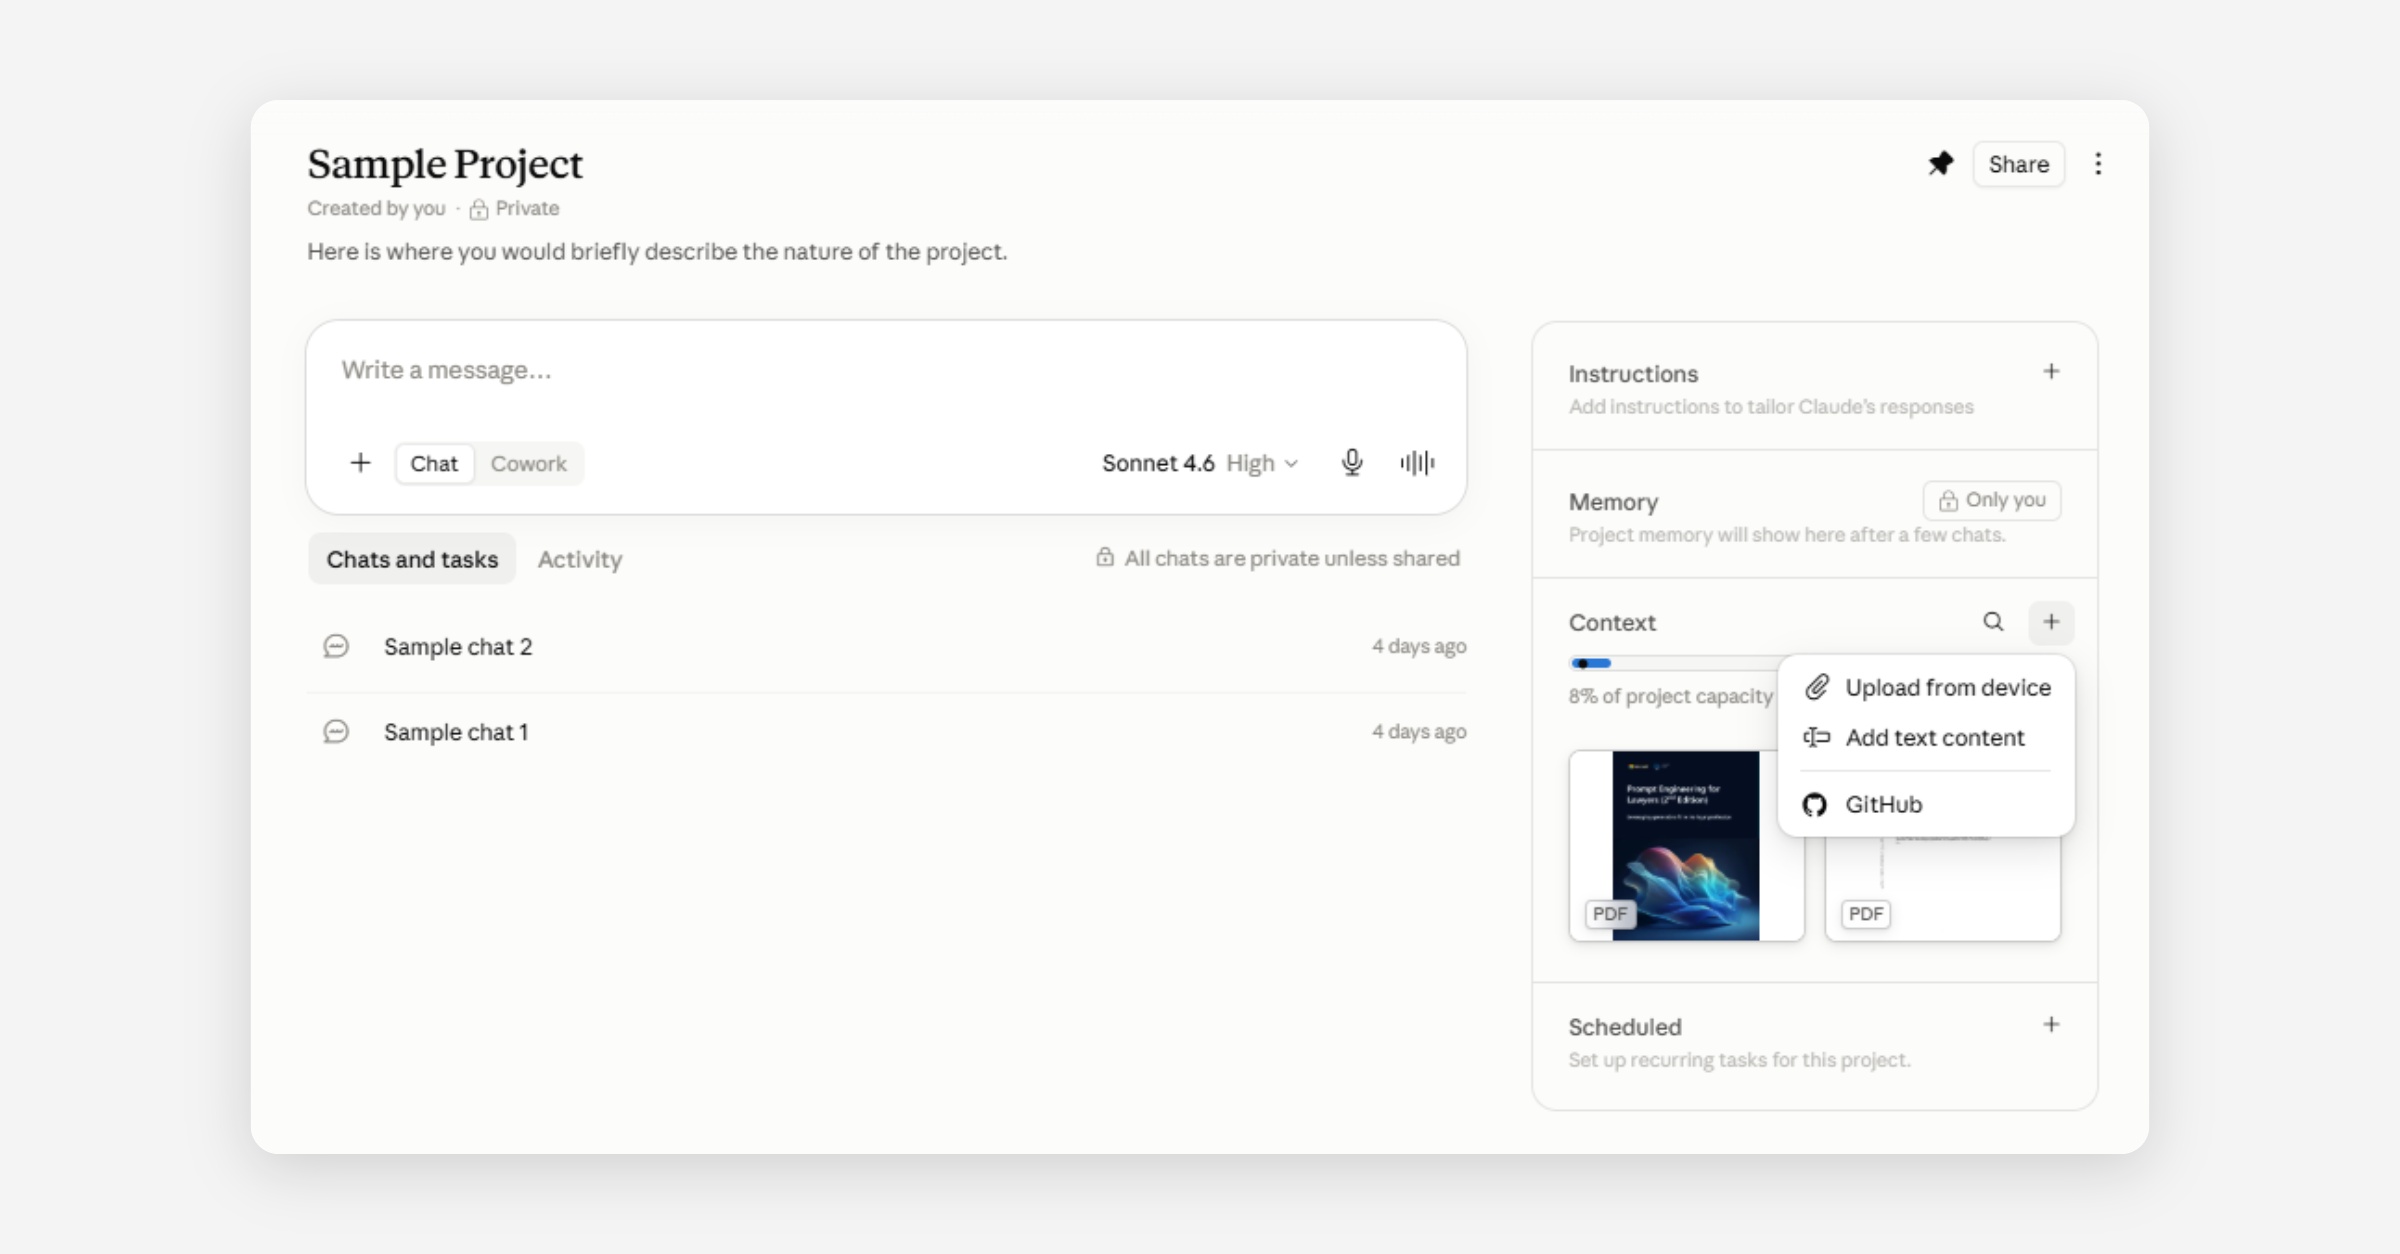
To complete project set-up in Claude, add project instructions, context, and task scheduling (see image below).
To add custom instructions, select the ‘+’ next to ‘Instructions'.
Add context documents from your device or add contextual text content using the ‘+’ next to ‘Context.’
Schedule project-specific tasks using the ‘+’ next to ‘Scheduled.’
Add chat-specific files using the ‘+’ within the designated chat. Navigate between project chats by selecting your preferred chat under ‘Chats and tasks.’
Finishing Project Set-up in ChatGPT
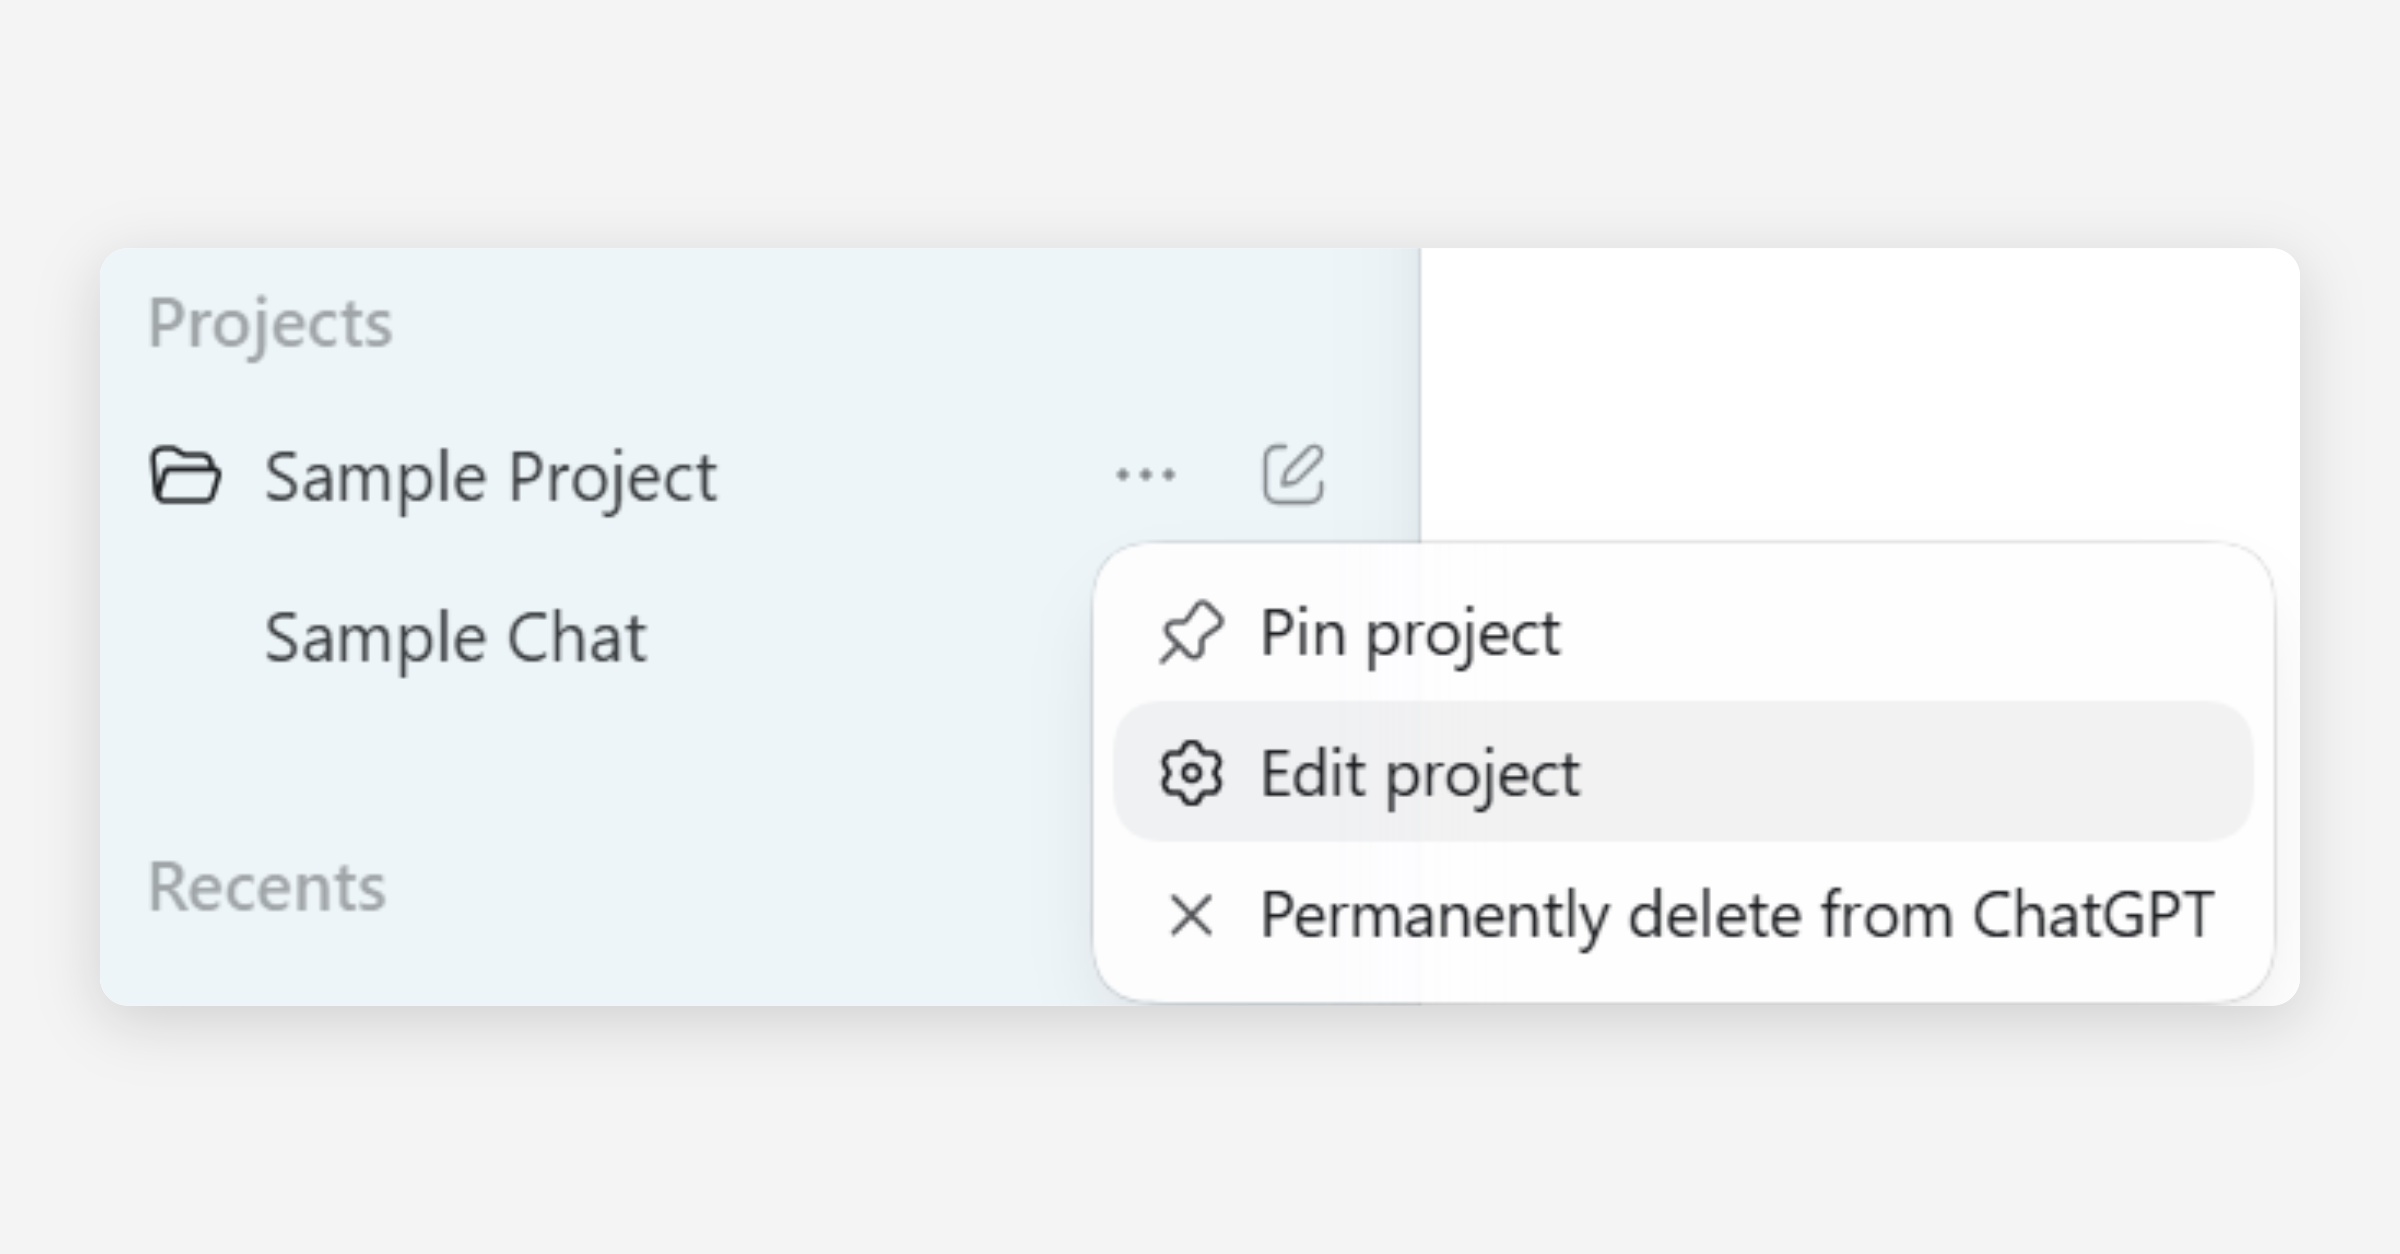
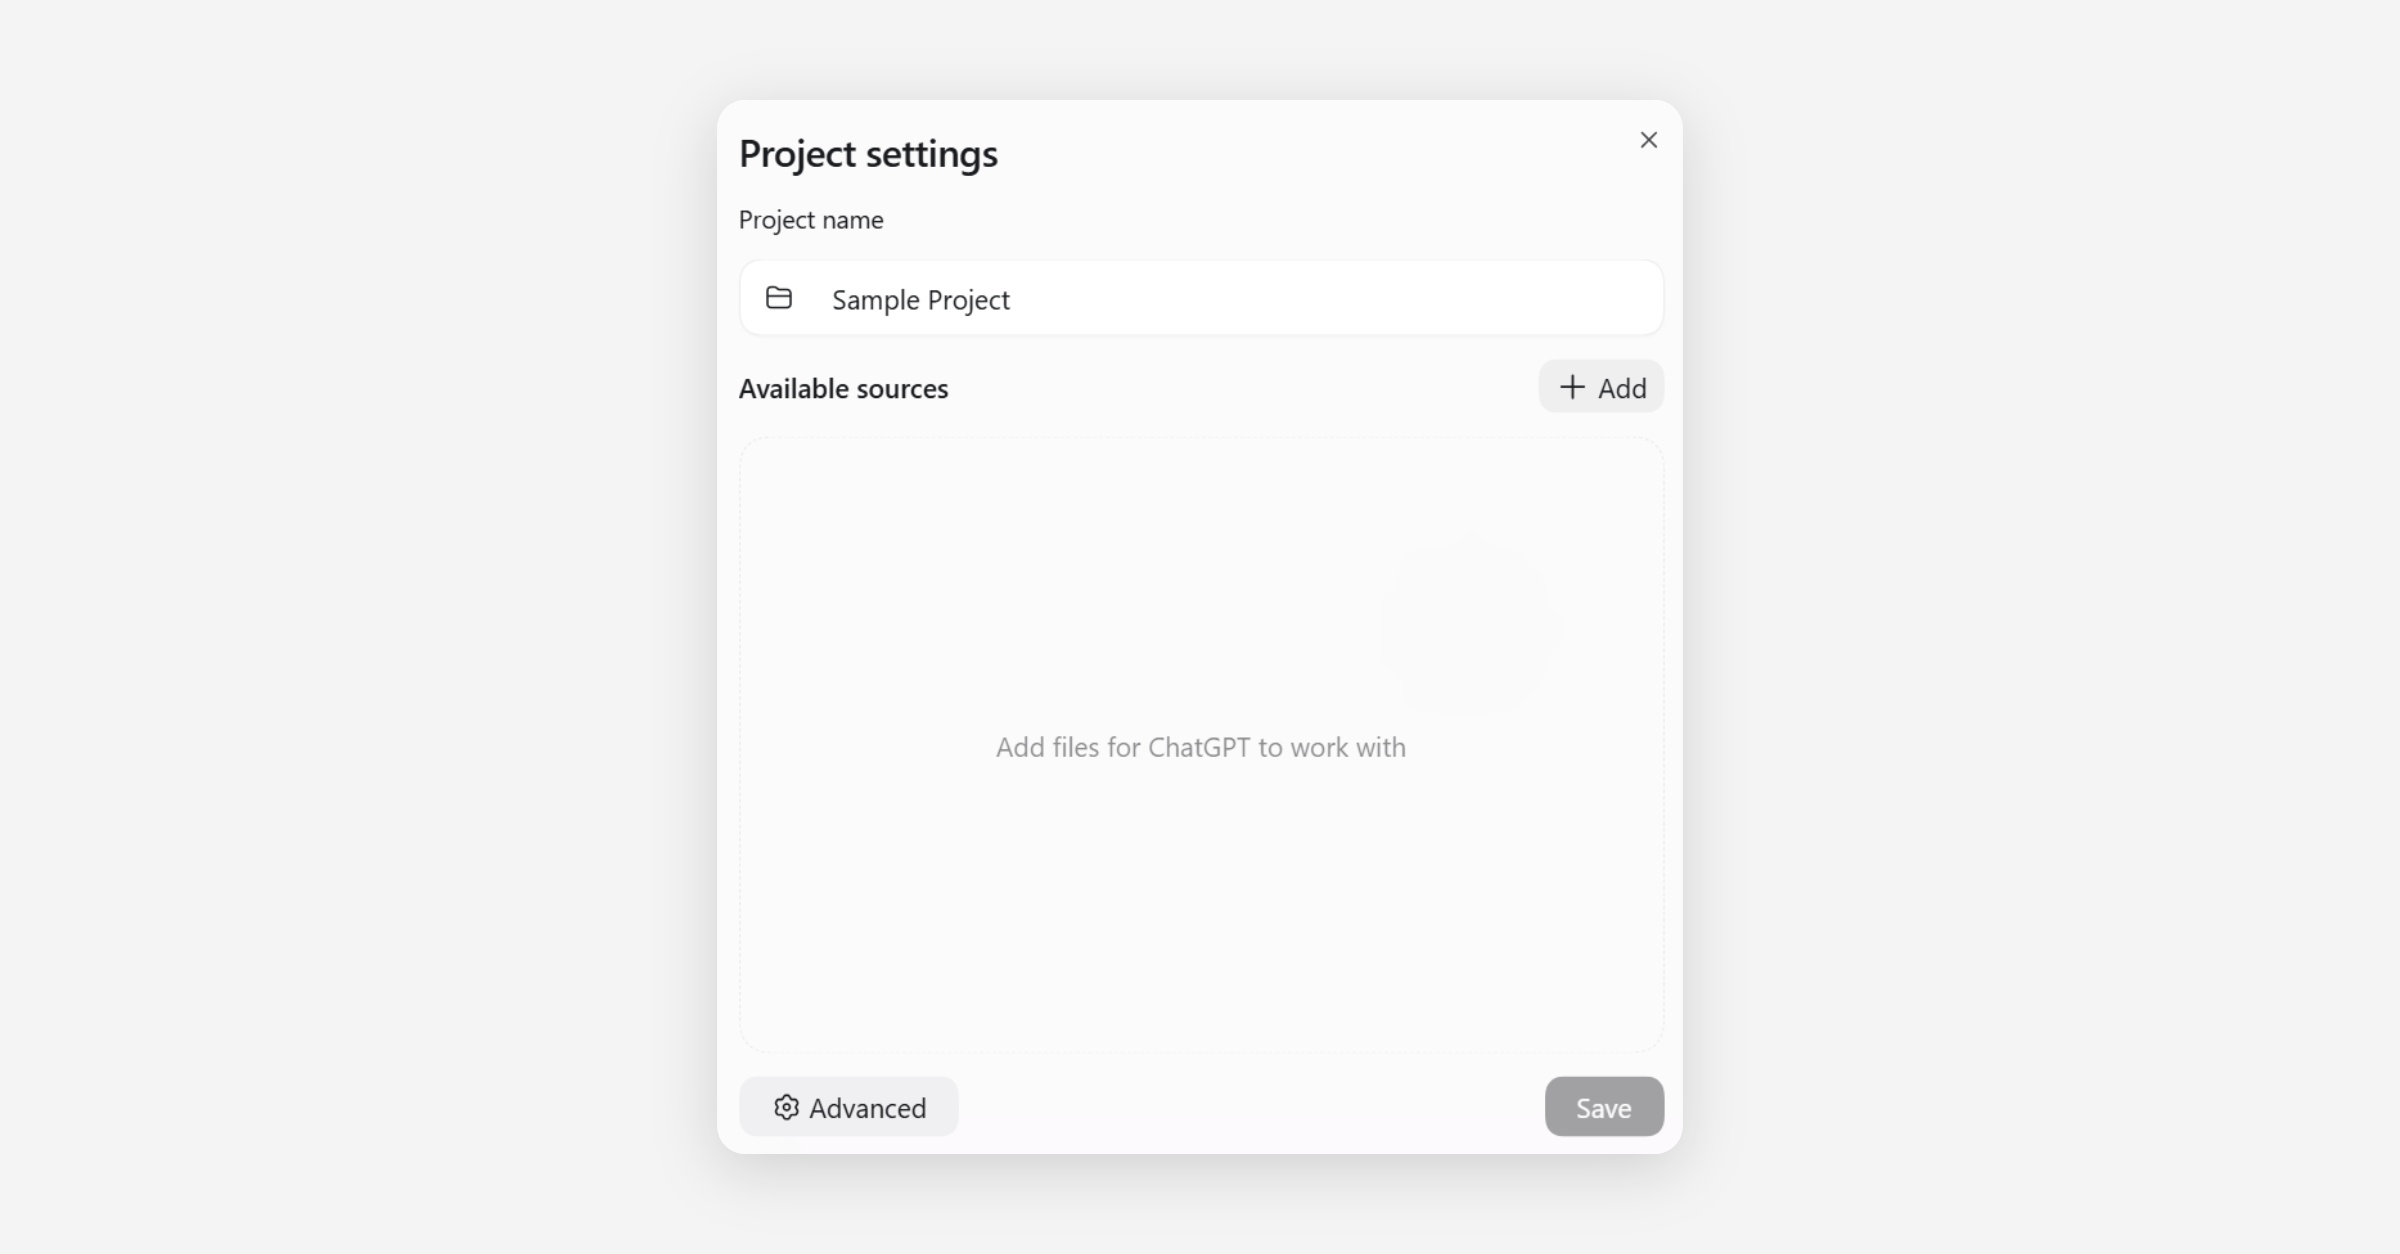
Sources for your ChatGPT project are initially added in the project creation phase. To add new documents or folders as context for your project, click on the three-diamond symbol next to your project, and select ‘Edit project’ from the drop-down menu (see top image in group below). A box will appear on-screen: click on ‘+ Add’ to add sources. (see 2nd image in group below).
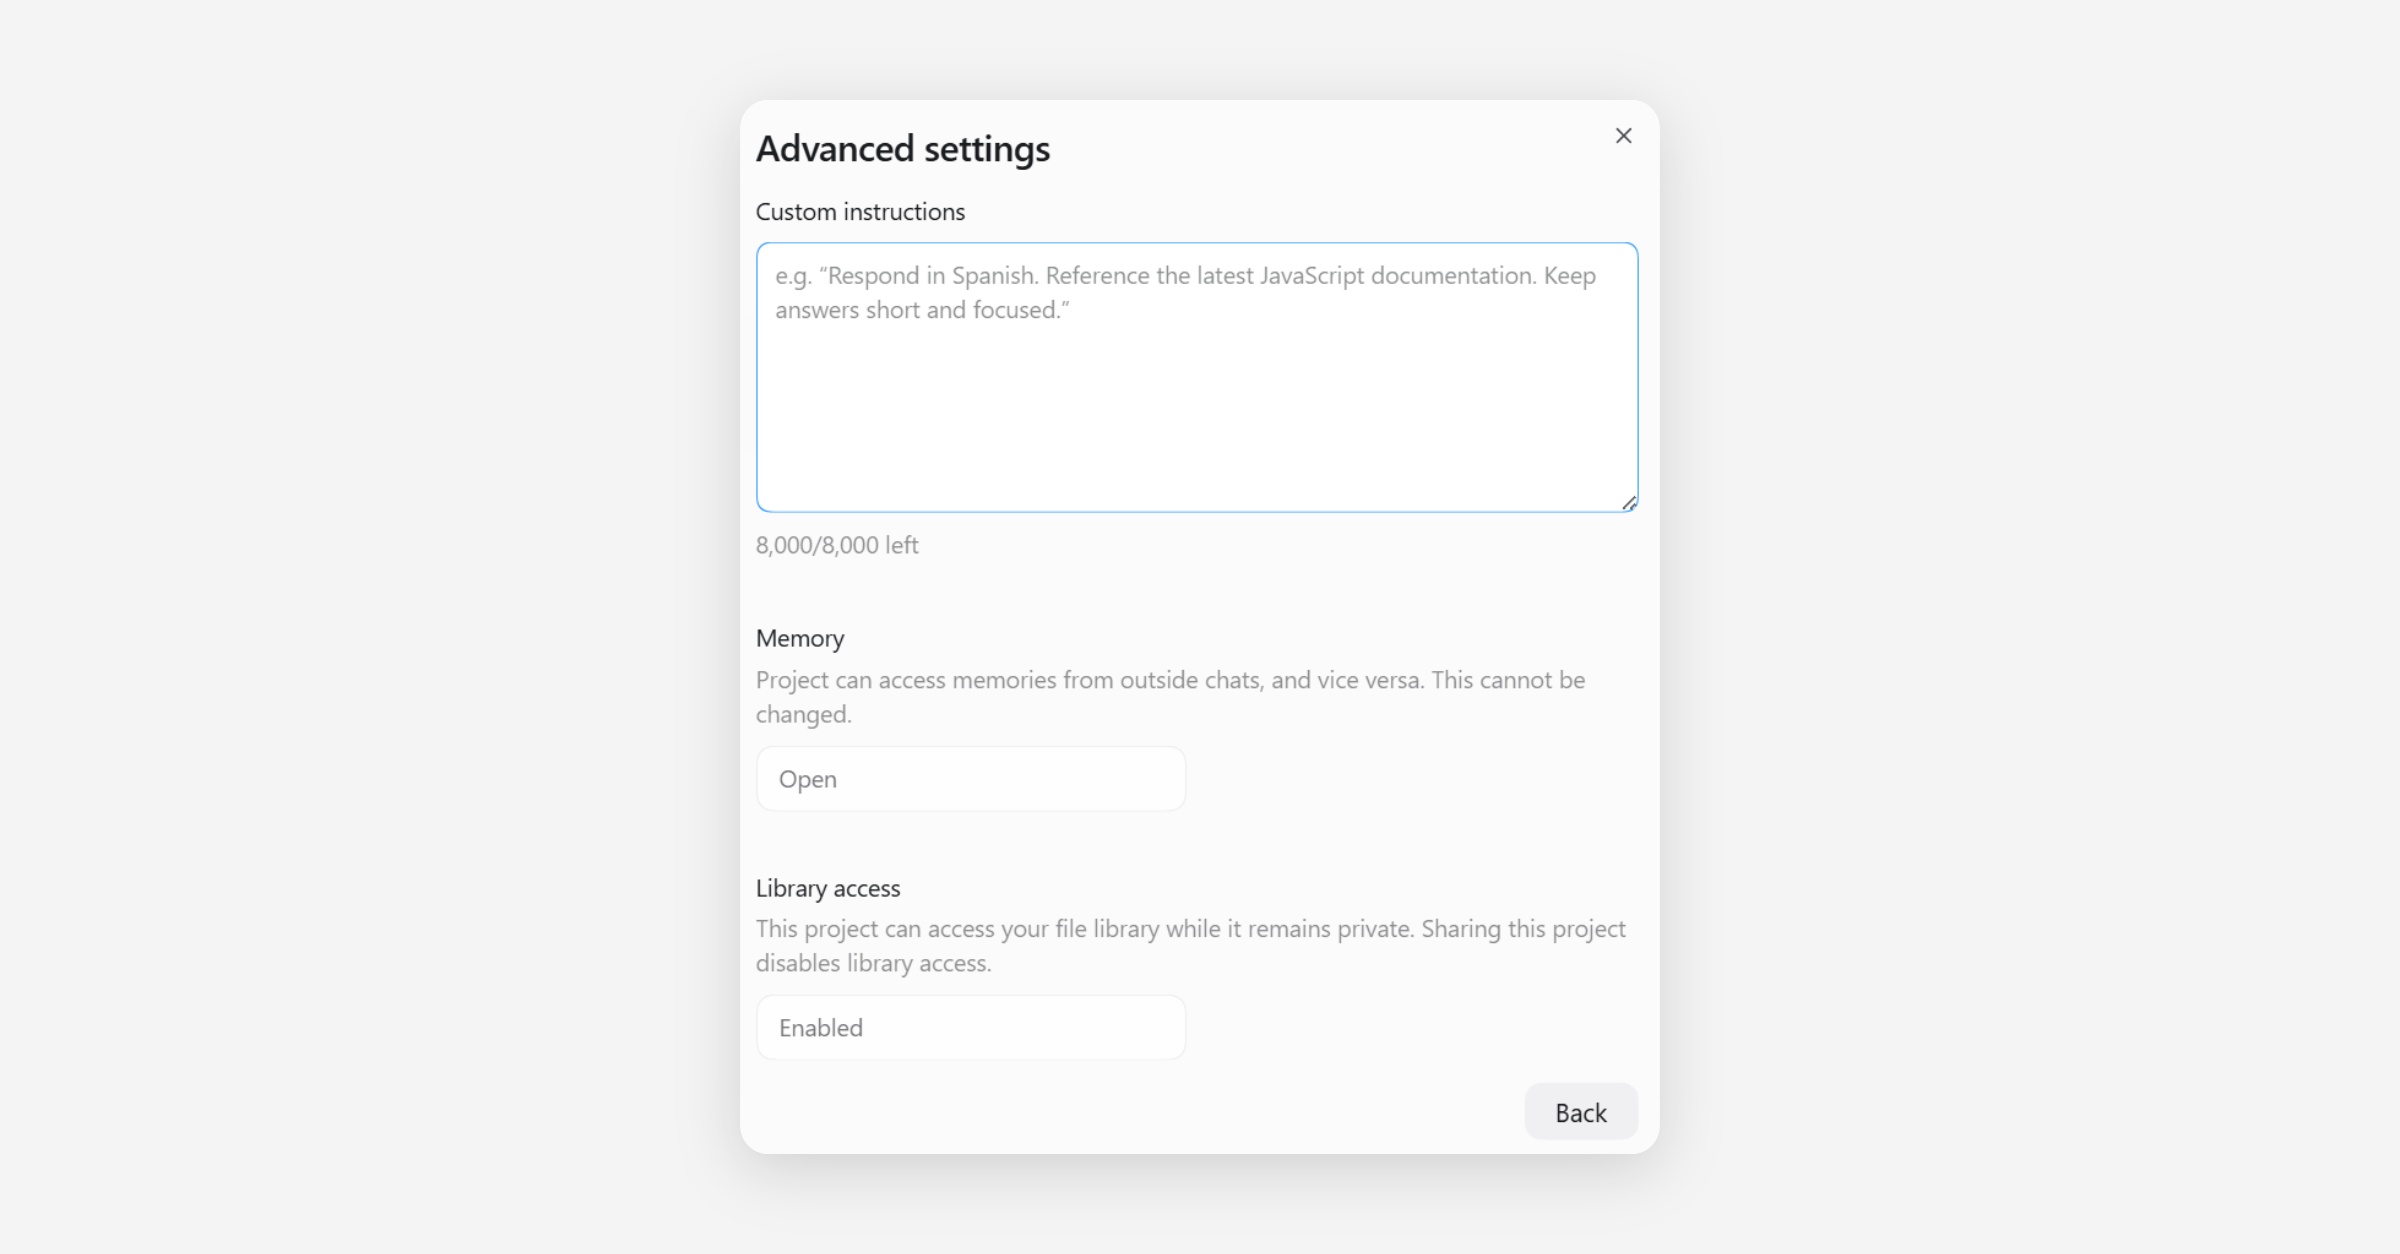
To add custom instructions to your ChatGPT project, click on ‘Advanced’ in the ‘Project settings’ interface (the same interface on which you can add new sources). Enter your instructions within the ‘Custom instructions’ box on the ‘Advanced settings’ interface that appears (see 3rd image in group below).
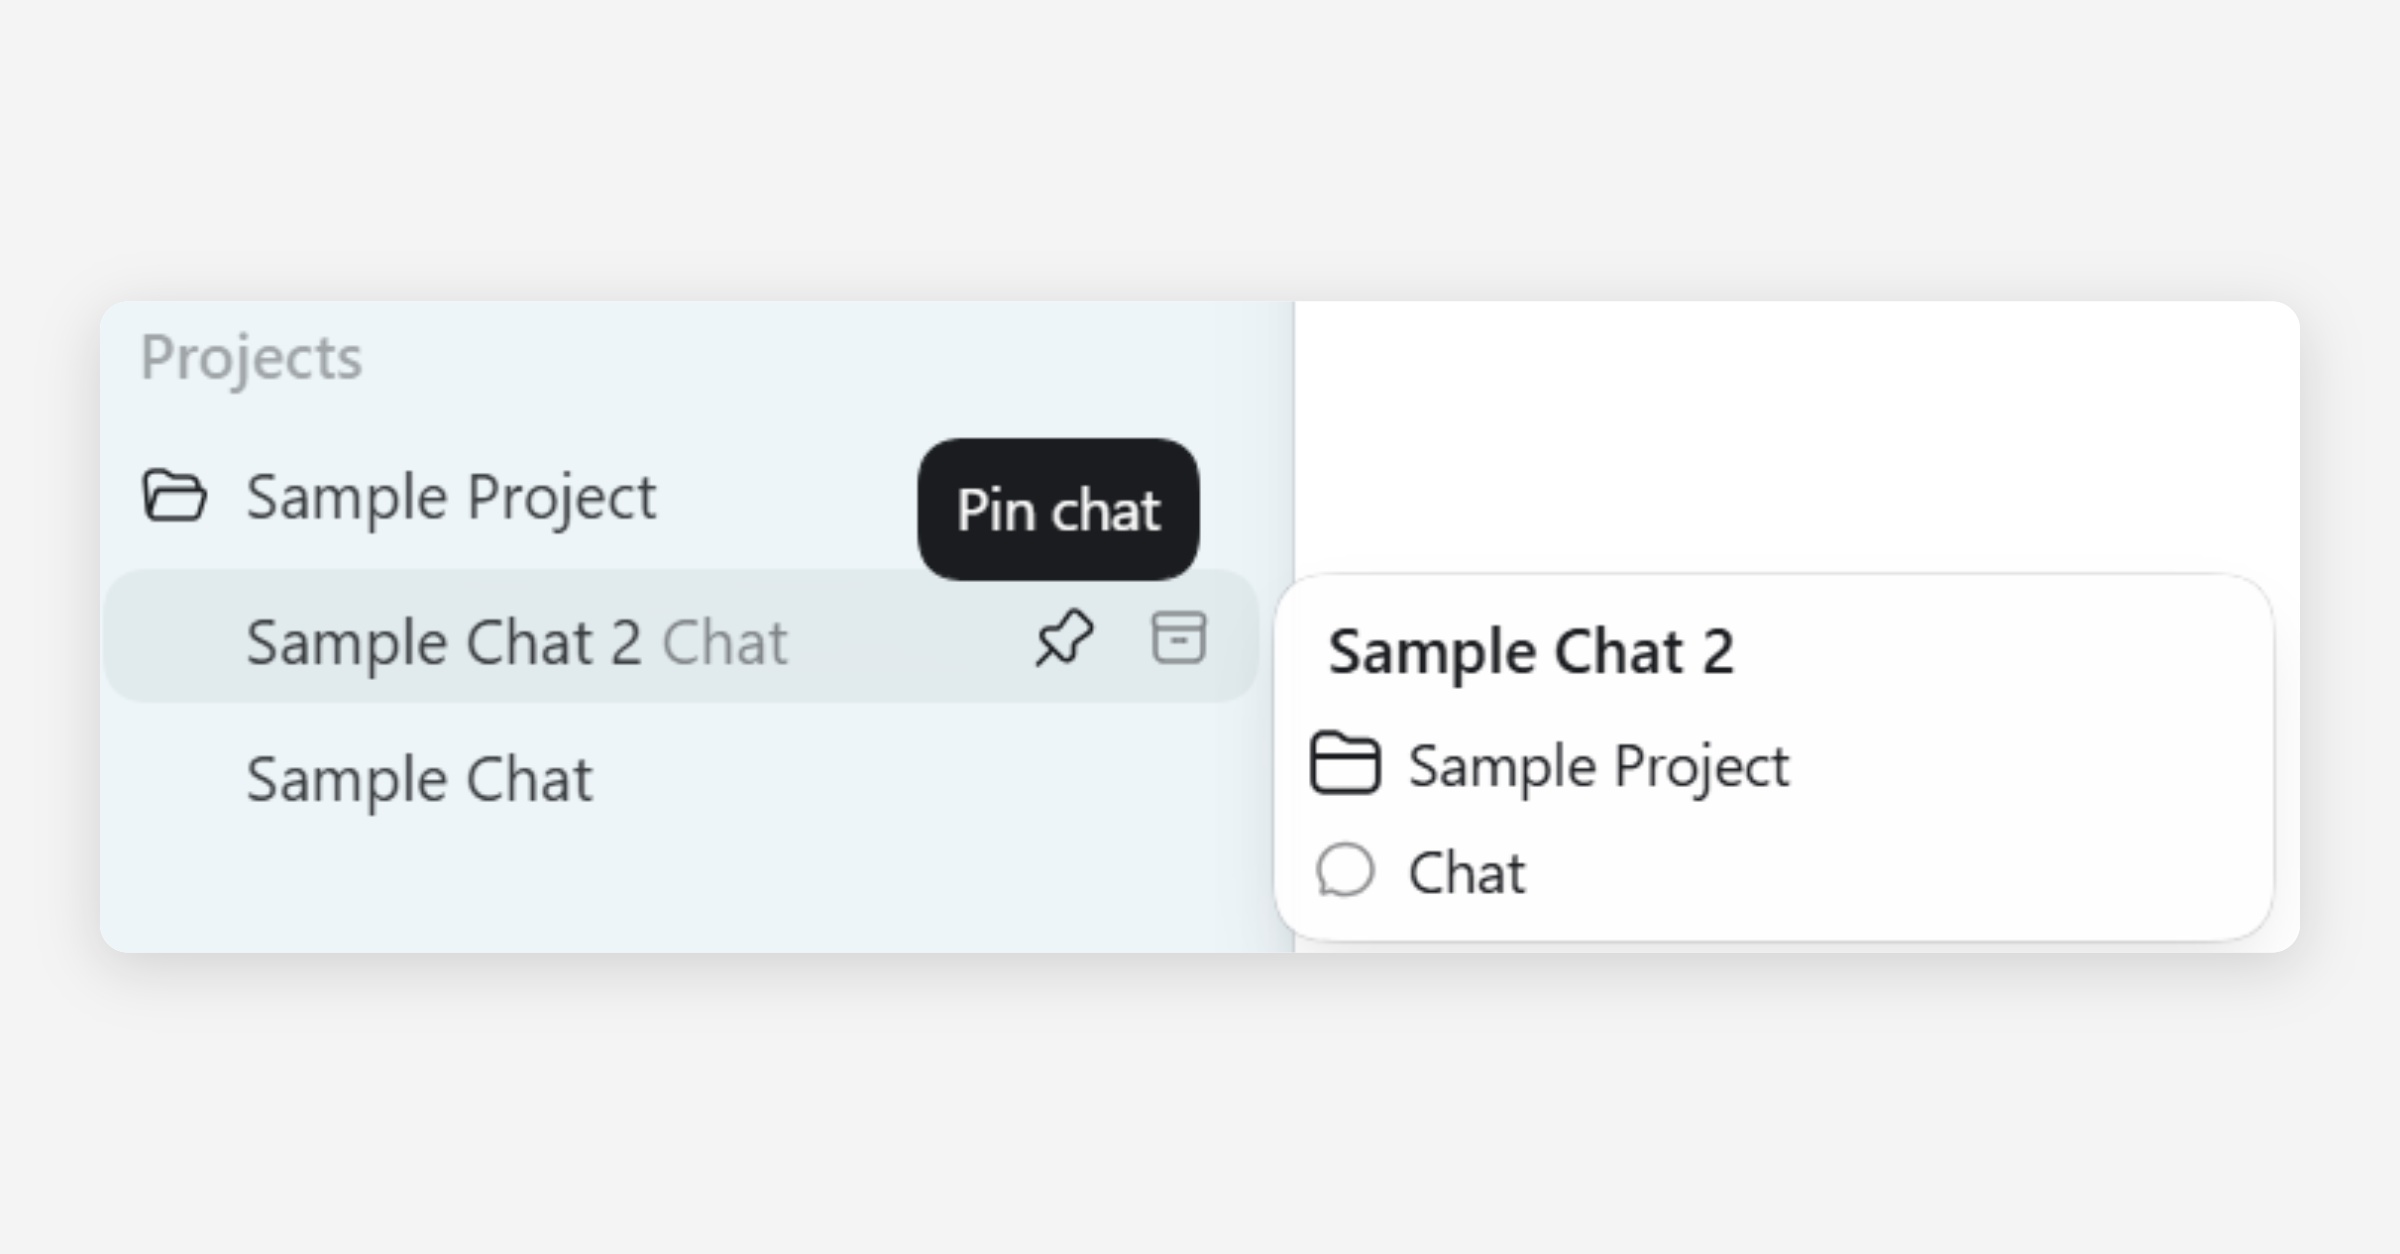
Add chat-specific files using the ‘+’ within the designated chat. Navigate between project chats by selecting your preferred chat in the left sidebar (see bottom image in group below). Pin a chat by selecting the pin icon next to that chat.
Finishing Project Set-up in the GP AI Interface
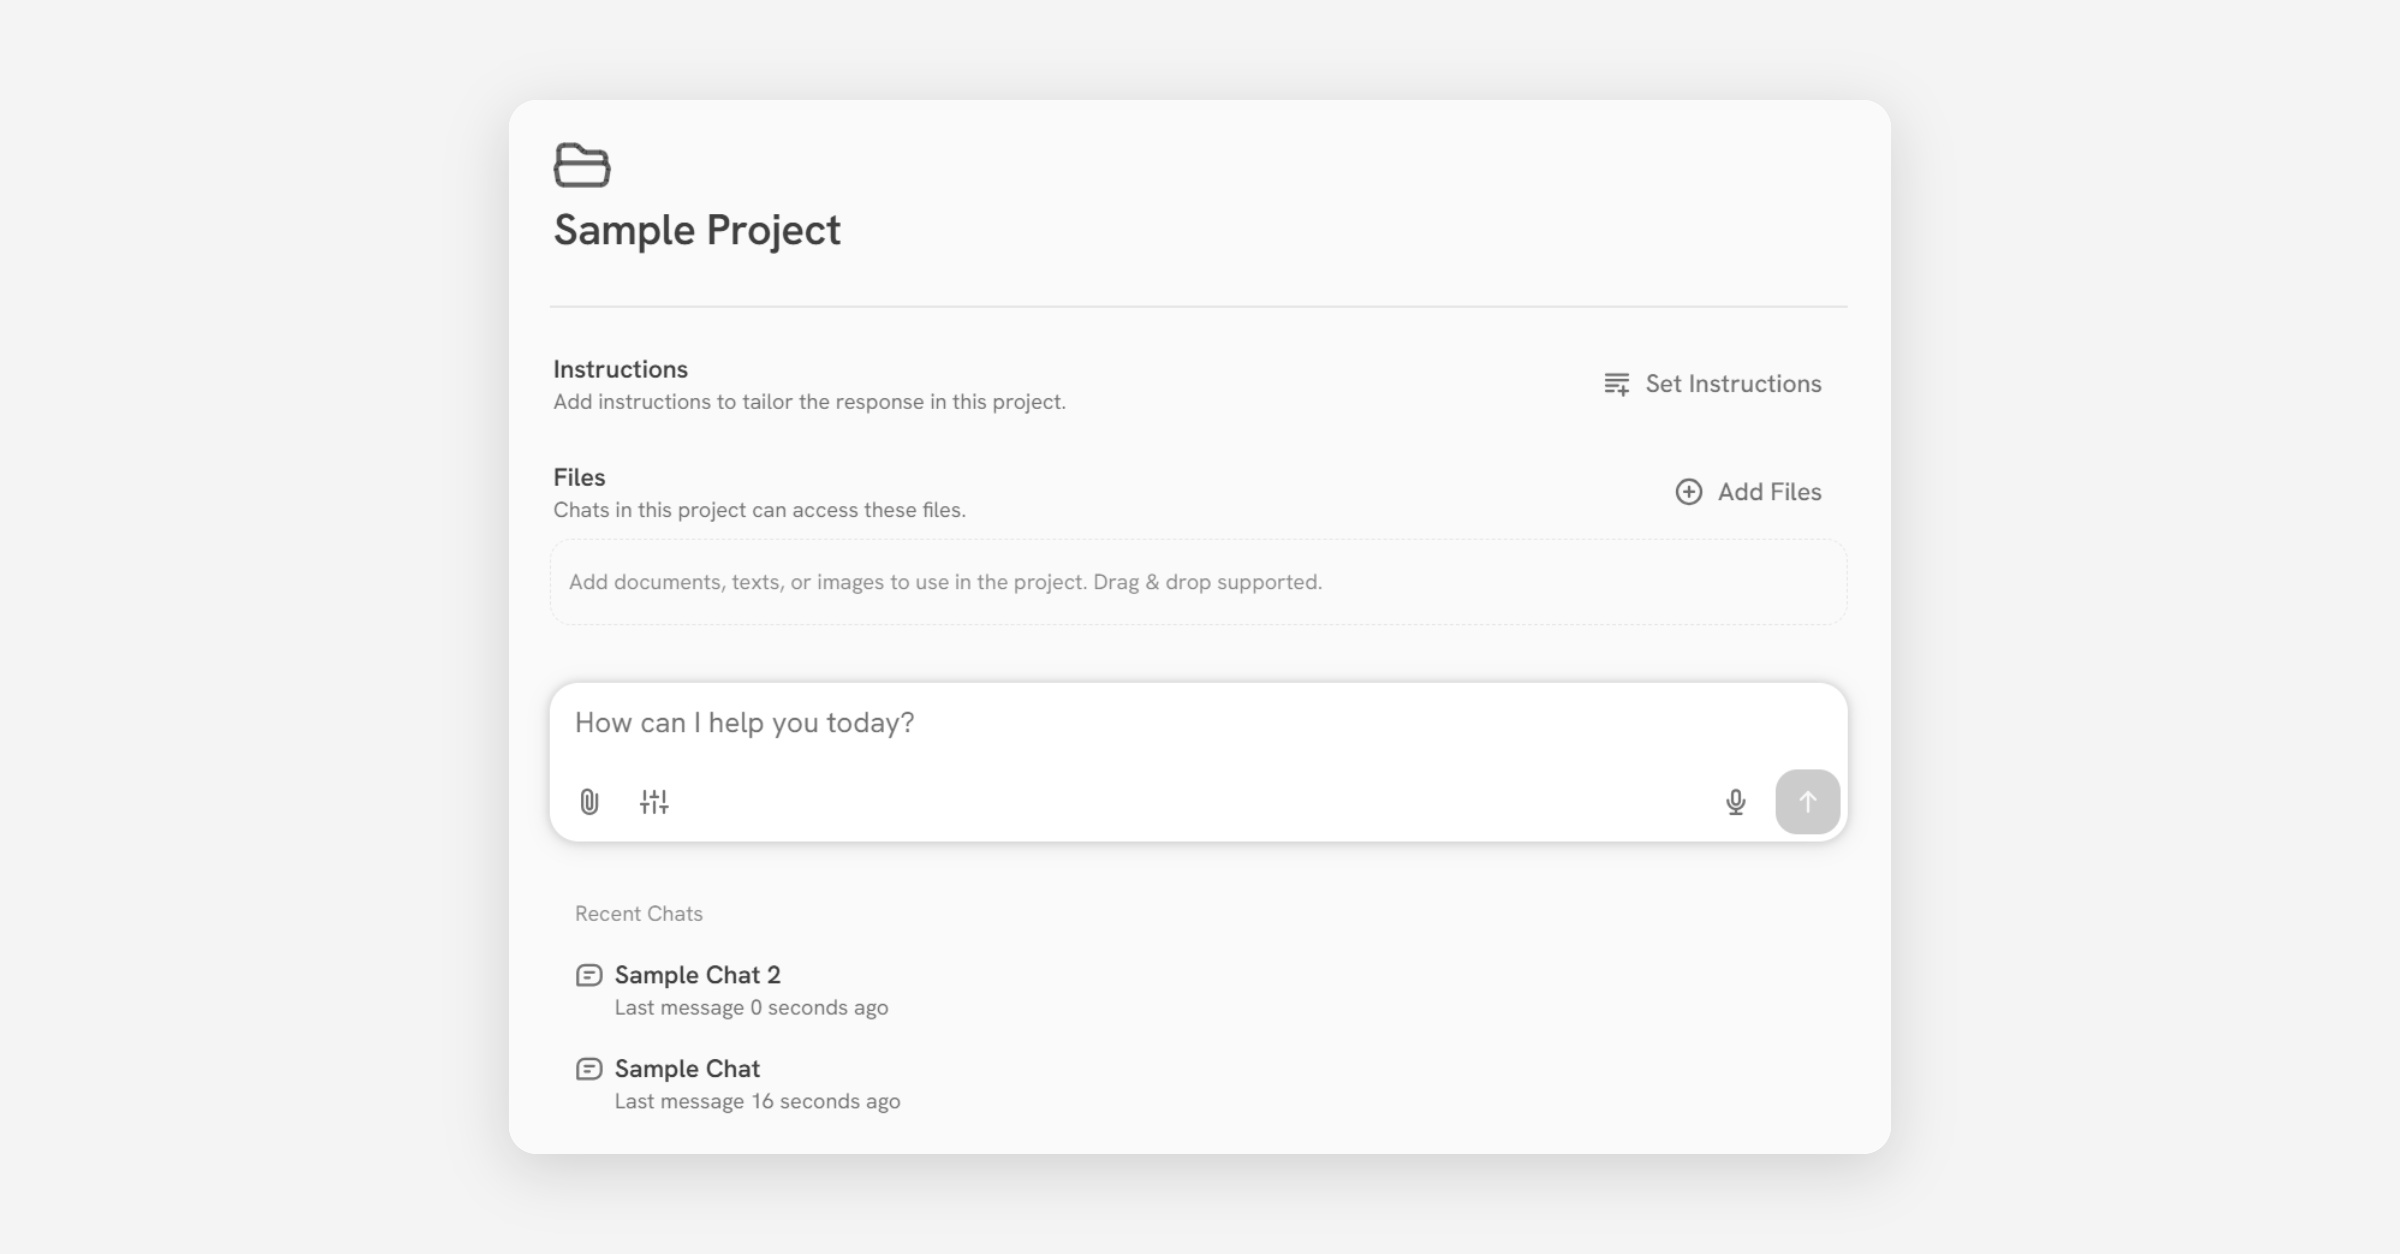
To complete project set-up in the GP AI Interface, add project instructions and project files (see image below).
To add project instructions, select ‘+ Set Instructions’ next to ‘Instructions' on the project’s main page.
Add context documents from your device using the ‘+ Add Files’ next to ‘Files.’
Add chat-specific files using the paper-clip icon within the designated chat. Navigate between project chats by selecting your preferred chat under ‘Recent Chats.’
Was this helpful?